
Build a Chatbot With Dialogflow
Chatbots make it possible for the average developer to deliver excellent (and affordable) customer service at scale - Building conversational experiences has never been easier thanks to the Dialogflow conversation platform.
Dialogflow is a free tool on Google Cloud for creating voice and text conversational interfaces. It uses Natural Language Processing NLP technology, allowing you to create experiences similar to Google Assistant or Amazon Alexa. In following lesson creates a chatbot from scratch in the three main steps:
- Create a chatbot on the Dialogflow Console
- Connect it to Firebase Cloud Functions (NodeJS)
- Interact with it from frontend Angular app
Part 1: Create a Chatbot
Before getting started, it is recommended that you have an existing Firebase or GCP project.
Create an Agent
An agent is basically a entity that contains the knowledge and behaviors used to respond to phrases and fulfill user intentions.
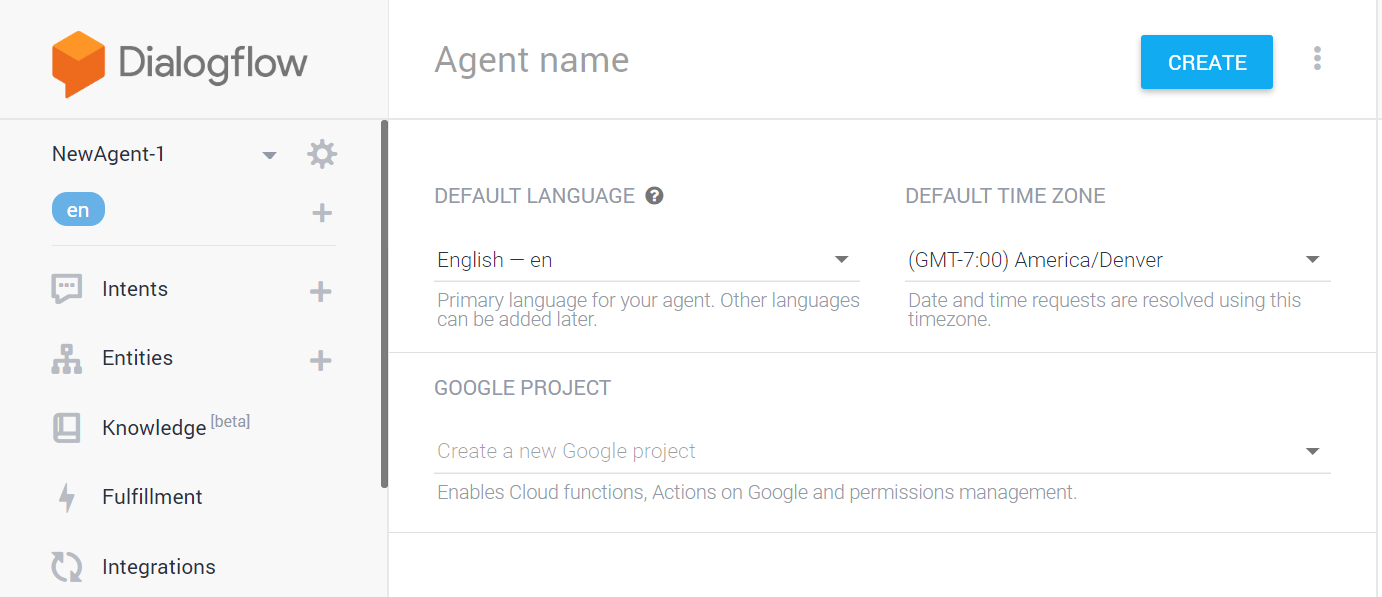
Create the Dialogflow Agent
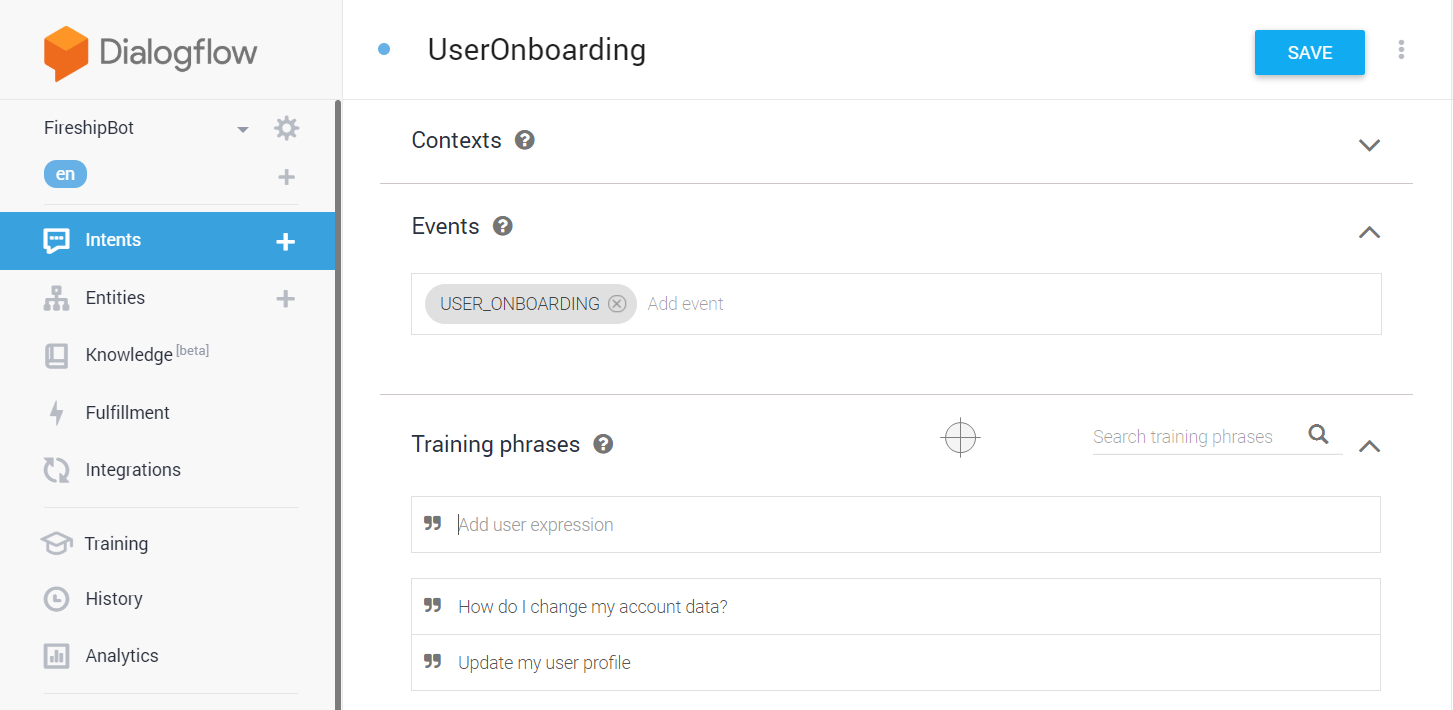
Create an Intent
Think of a conversation as a turn-based game. An Intent represents the end-user’s goal or intention based on their last turn. When the bot is able to classify the intent, it can respond with useful information.
Example:
USER: Can you change my username to bob23
Bot recognizes question/intent and fulfills the request by updating Firestore from a Cloud Function.
BOT: Absolutely, it has been updated in the database!
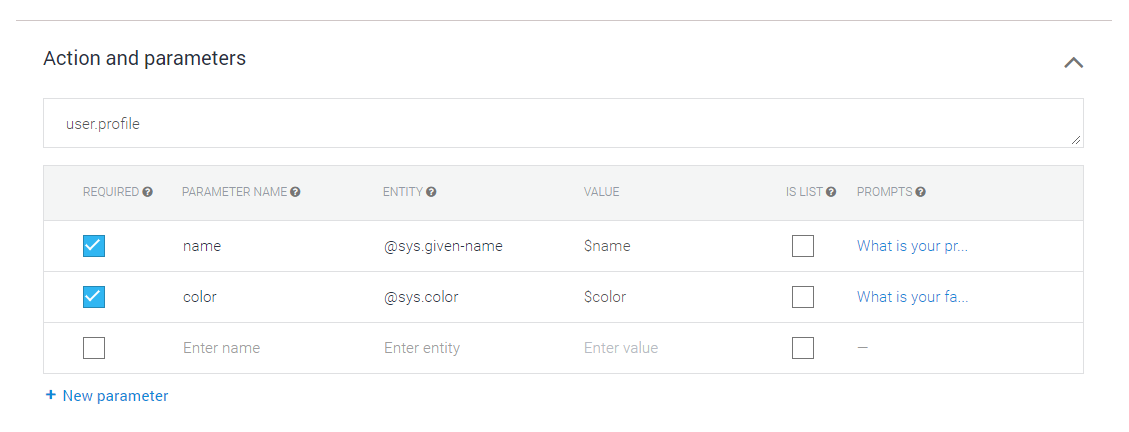
Actions and Parameters
In this example, we want our bot to determine the user’s preferred display name and favorite color. We can do that by providing prompts that extract that data. After all required params have been extracted, we will use them to permanently update the user’s record in the Firestore database. Dialogflow will ask the questions specified as prompts until it receives a valid entity value for that param.
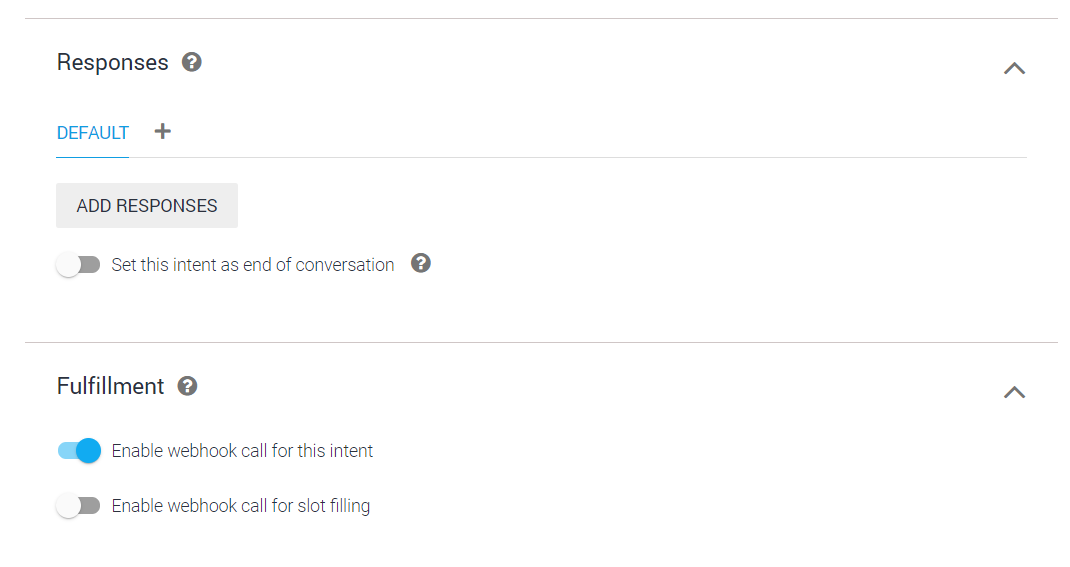
Responses and Fulfillment
When an intent is completed you can setup a simple response in the Dialogflow console OR you can handle the fulfillment with a webhook. Enable a webhook call for this function.
Part 2: Backend Cloud Functions
Communicating with Dialogflow must be done on the server. In this section, we create HTTP Cloud Functions that enable frontend applications to communication with our agent.
Add your Service Account
Dialogflow requires your full service account. Download it from the Firebase Console to functions/service-account.json.
⚠️ Make sure to add the service account path to your .gitignore because it contains sensitive API keys that should not be exposed publicly.
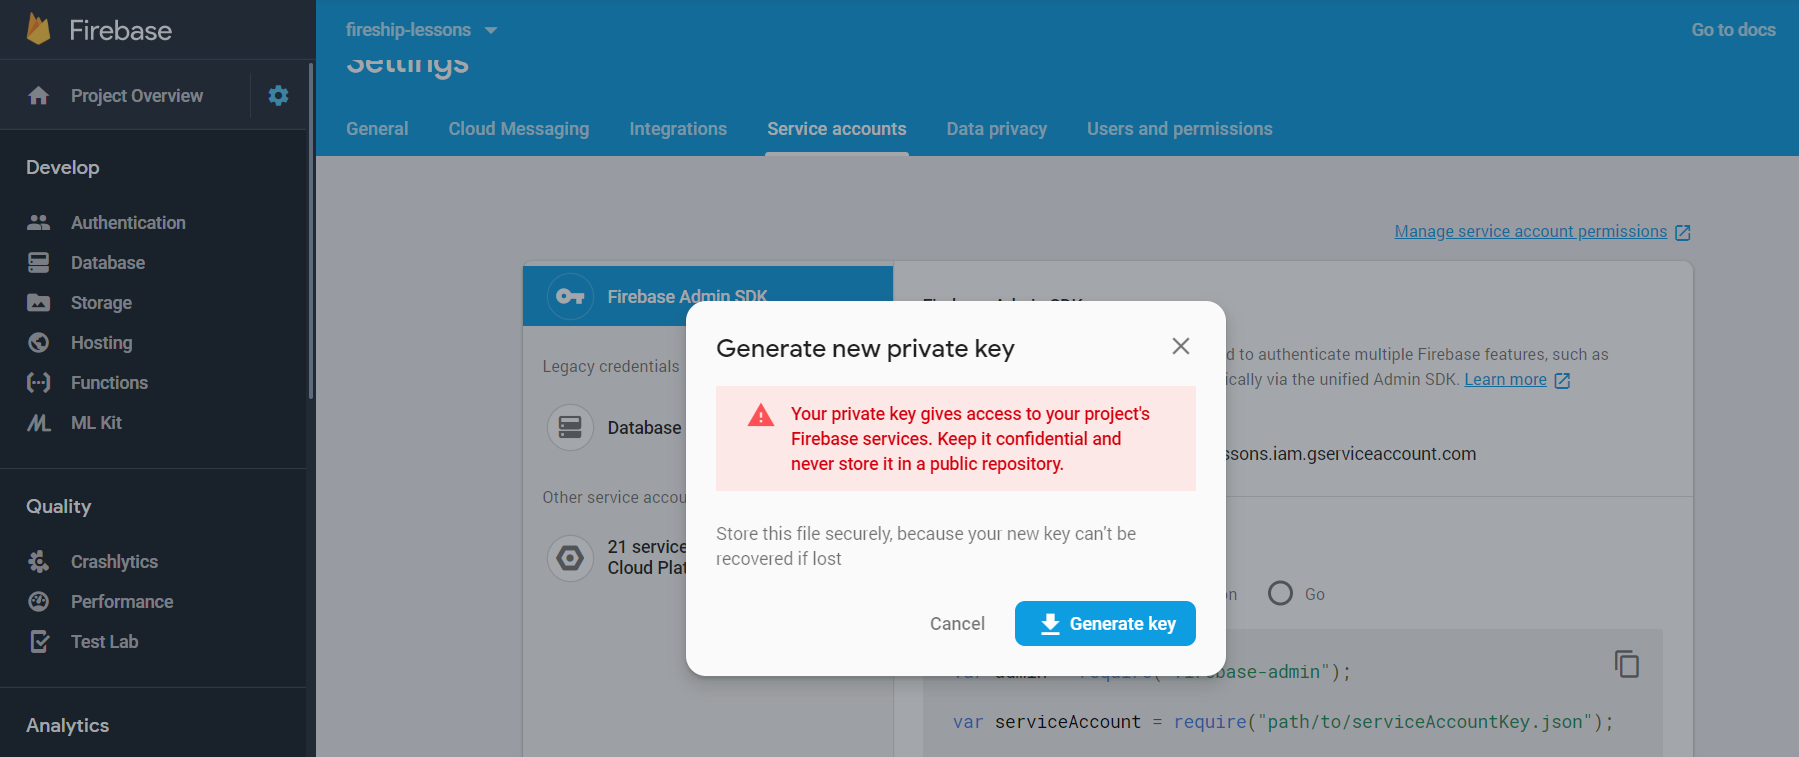
Download your service account
Handling Conversations
This first function is a generic endpoint that allows a frontend app to connect to the Dialogflow API. The function expects the client to pass a sessionId, which is just a string that allows the bot to understand the current context of a conversation. It also expects the users queryInput text, which is what the user is saying to the bot.
cd functions
npm i dialogflow cors
const functions = require('firebase-functions');
const cors = require('cors')({ origin: true});
const admin = require('firebase-admin');
const serviceAccount = require('./service-account.json');

admin.initializeApp({
  credential: admin.credential.cert(serviceAccount),
  databaseURL: "https://fireship-lessons.firebaseio.com"
});

const { SessionsClient } = require('dialogflow');


exports.dialogflowGateway = functions.https.onRequest((request, response) => {
  cors(request, response, async () => {
    const { queryInput, sessionId } = request.body;


    const sessionClient = new SessionsClient({ credentials: serviceAccount  });
    const session = sessionClient.sessionPath('your-project', sessionId);


    const responses = await sessionClient.detectIntent({ session, queryInput});

    const result = responses[0].queryResult;

    response.send(result);
  });
});
Fulfilling Intents with a Webhook
The benefit of a webhook is that you can perform additional backend logic, like updating a database or reaching out to a another API, then format the response to the user dynamically. In this example, we take the name and color parameters from the user’s conversation and update their account in Firestore.
npm i dialogflow-fulfillment actions-on-google
const { WebhookClient } = require('dialogflow-fulfillment');

exports.dialogflowWebhook = functions.https.onRequest(async (request, response) => {
    const agent = new WebhookClient({ request, response });

    const result = request.body.queryResult;


    async function userOnboardingHandler(agent) {

     // Do backend stuff here
     const db = admin.firestore();
     const profile = db.collection('users').doc('jeffd23');

     const { name, color } = result.parameters;

      await profile.set({ name, color })
      agent.add(`Welcome aboard my friend!`);
    }


    let intentMap = new Map();
    intentMap.set('UserOnboarding', userOnboardingHandler);
    agent.handleRequest(intentMap);
});
Part 3: Frontend Angular Integration
In this section, we build a user-friendly chat UI to interact with the bot. We can quickly build this feature with the Nebular theme and Angular’s HTTP client.
Initial Setup
Install Nebular and import Angular’s HTTP Client in your app.
ng new my-app --routing
cd my-app

ng add @nebular/theme

ng generate component chatbot
The app module should look something like this:
import { BrowserModule } from '@angular/platform-browser';
import { NgModule } from '@angular/core';
import { HttpClientModule } from '@angular/common/http';

import { AppRoutingModule } from './app-routing.module';
import { AppComponent } from './app.component';
import { BrowserAnimationsModule } from '@angular/platform-browser/animations';
import { NbThemeModule, NbLayoutModule, NbChatModule, NbSpinnerModule } from '@nebular/theme';
import { NbEvaIconsModule } from '@nebular/eva-icons';
import { ChatbotComponent } from './chatbot/chatbot.component';


@NgModule({
  declarations: [
    AppComponent,
    ChatbotComponent
  ],
  imports: [
    BrowserModule,
    AppRoutingModule,
    HttpClientModule,
    BrowserAnimationsModule,
    NbThemeModule.forRoot({ name: 'default' }),
    NbLayoutModule,
    NbEvaIconsModule,
    NbChatModule,
    NbSpinnerModule,
  ],
  providers: [],
  bootstrap: [AppComponent]
})
export class AppModule { }
Chatbot Component
import { Component, OnInit } from '@angular/core';
import { HttpClient } from '@angular/common/http';

const dialogflowURL = 'https://YOUR-CLOUDFUNCTION/dialogflowGateway';

@Component({
  selector: 'app-chatbot',
  templateUrl: './chatbot.component.html',
  styleUrls: ['./chatbot.component.scss']
})
export class ChatbotComponent implements OnInit {

  messages = [];
  loading = false;

  // Random ID to maintain session with server
  sessionId = Math.random().toString(36).slice(-5);

  constructor(private http: HttpClient) { }

  ngOnInit() {
    this.addBotMessage('Human presence detected 🤖. How can I help you? ');
  }

  handleUserMessage(event) {
    console.log(event);
    const text = event.message;
    this.addUserMessage(text);

    this.loading = true;

    // Make the request
    this.http.post<any>(
      dialogflowURL,
      {
        sessionId: this.sessionId,
        queryInput: {
          text: {
            text,
            languageCode: 'en-US'
          }
        }
      }
    )
    .subscribe(res => {
      const { fulfillmentText } = res;
      this.addBotMessage(fulfillmentText);
      this.loading = false;
    });
  }

  addUserMessage(text) {
    this.messages.push({
      text,
      sender: 'You',
      reply: true,
      date: new Date()
    });
  }

  addBotMessage(text) {
    this.messages.push({
      text,
      sender: 'Bot',
      avatar: '/assets/bot.jpeg',
      date: new Date()
    });
  }

}
Chatbot Template
<nb-chat title="Conversation with a Bot">
    <nb-chat-message *ngFor="let msg of messages"
                     type="text"
                     [message]="msg.text"
                     [reply]="msg.reply"
                     [sender]="msg.sender"
                     [date]="msg.date"
                     [avatar]="msg.avatar">
</nb-chat-message>


<nb-chat-message *ngIf="loading" [nbSpinner]="loading" nbSpinnerStatus="info"
    type="text"
    avatar="/assets/bot.jpeg"
    message="...">

</nb-chat-message>


    <nb-chat-form (send)="handleUserMessage($event)" [dropFiles]="true">
    </nb-chat-form>

</nb-chat>