
FCM Push Notifications for Flutter
When used correctly, push notifications can be an excellent way to drive user engagement and keep your app in focus on a consistent basis. When used incorrectly, they can be annoying and motivate users to simply uninstall your app and never look back. Fortunately, Firebase Cloud Messaging (FCM) provides a sophisticated set of tools to send notifications only to users who actually want them. The following lesson will teach you how to configure FCM in Flutter to broadcast both Topic-based, Device-based, and Segment-based push notifications.
Before getting started, it is important to understand that there are three types of FCM push notifications you can send to a device.
- Device Token. Sends a message to a single device.
- Topic Subscription. Sends a message to multiple devices that explicitly subscribed to a topic.
- User Segment. Sends a notification to a subset of users based on your analytics data.
Step 0: Initial Setup
- Install FlutterFire
In addition to FCM, we will also install Cloud Firestore and Firebase Auth to build a full-stack push notification service.
dependencies:
  flutter:
    sdk: flutter

  firebase_core: ^0.4.0
  firebase_auth: ^0.11.1+6
  cloud_firestore: ^0.12.5

  firebase_messaging: ^5.0.2
Android
Android does not require any specific configuration, unless you want to run code after a notification is clicked-on from the device tray (while the app was in the backgrond).
<intent-filter>
    <action android:name="FLUTTER_NOTIFICATION_CLICK" />
    <category android:name="android.intent.category.DEFAULT" />
</intent-filter>
iOS
iOS apps are required to generate a certificate for the Apple Push Notification service (APNs) and enable background services in Xcode. Rather than duplicate the content from the documentation, I recommend following the official setup guide from Firebase.
Step 1: Receive Messages in Flutter (Frontend)
- Get permission (iOS only).
- Get the token for the device OR subscribe the user to a topic.
- Save it to a database (for single device notifications).
- Handle incoming messages both in the foreground & background.
All logic can be handled within a StatefulWidget. This allows you to resuse the FCM logic across multiple screens if necessary.
import 'dart:io';
import 'package:flutter/material.dart';

import 'package:firebase_messaging/firebase_messaging.dart';
import 'package:cloud_firestore/cloud_firestore.dart';

class MessageHandler extends StatefulWidget {
  @override
  _MessageHandlerState createState() => _MessageHandlerState();
}

class _MessageHandlerState extends State<MessageHandler> {
  final Firestore _db = Firestore.instance;
  final FirebaseMessaging _fcm = FirebaseMessaging();

    // TODO...

}
Get Permission on iOS
On iOS, you must explicitly get permission from the user to send notifications. This can handled when the widget is initialized, or better yet, you might strategically request permission when the user is most likely to say “yes”.
    // ...

    StreamSubscription iosSubscription;

    @override
    void initState() {
        super.initState();
        if (Platform.isIOS) {
            iosSubscription = _fcm.onIosSettingsRegistered.listen((data) {
                // save the token  OR subscribe to a topic here
            });

            _fcm.requestNotificationPermissions(IosNotificationSettings());
        }

    }
Show the Notification UI in the Foreground
The callback that fires when a message is received depends on the OS. Here is a general rule you can follow, but read the official docs to understand all the edge cases.
onMessagefires when the app is open and running in the foreground.onResumefires if the app is closed, but still running in the background.onLaunchfires if the app is fully terminated.
When the notification is received in the foreground (the app is open), we can handle it with one of Flutter’s built-in widgets.
Simple notifications can be handled in the foreground with a SnackBar. The snackbar has room for a short sentence and a single action. It will be auto-dismissed if the user does not engage with the alert.
More complex notifications may benefit from a full AlertDialog screen. The onMessage callback is called when the app is running in the foreground.
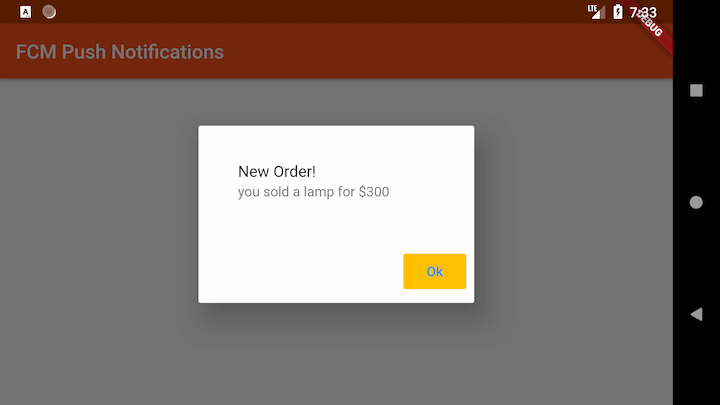
The appearance of a notification when running in the foreground with an AlertDialog widget
When the app is closed, the notification will appear in the device tray with your app name, icon, and notification details. When clicked, it will open the app and run the onResume or onLaunch callbacks.
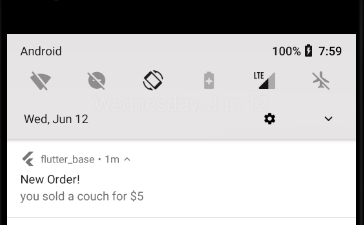
The appearance of a notification in the device tray in the background
    @override
    void initState() {

        // ...

        _fcm.configure(
          onMessage: (Map<String, dynamic> message) async {
            print("onMessage: $message");
            showDialog(
                context: context,
                builder: (context) => AlertDialog(
                        content: ListTile(
                        title: Text(message['notification']['title']),
                        subtitle: Text(message['notification']['body']),
                        ),
                        actions: <Widget>[
                        FlatButton(
                            child: Text('Ok'),
                            onPressed: () => Navigator.of(context).pop(),
                        ),
                    ],
                ),
            );
        },
        onLaunch: (Map<String, dynamic> message) async {
            print("onLaunch: $message");
            // TODO optional
        },
        onResume: (Map<String, dynamic> message) async {
            print("onResume: $message");
            // TODO optional
        },
      );
    }
Segmented Notifications
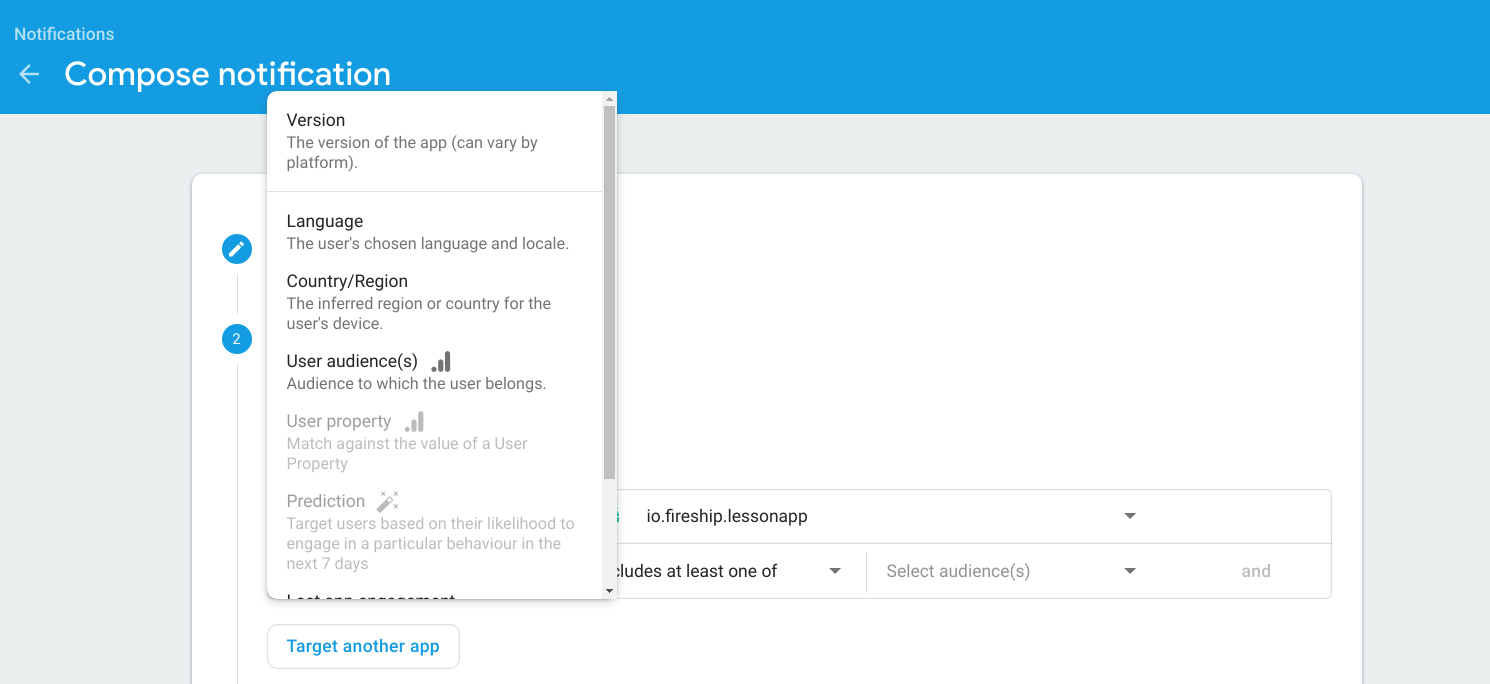
At this point, you can send segmented notifications directly from the Firebase Notification Composer console based on the Analytics data you collect from users.
Topic Based Notifications
Topic-based notifications can be subscribed to in the background, or the user can manually opt-in by clicking a button.
    FlatButton(
        child: Text('I like puppies'),
        onPressed: () => _fcm.subscribeToTopic('puppies');,
    ),

    FlatButton(
        child: Text('I hate puppies'),
        onPressed: () => _fcm.unsubscribeFromTopic('puppies');,
    ),
You may also want to save the user’s manual topic subscriptions in the database because they cannot be retrieved directly through the SDK.
Individual Device Notifications
In order to send personalized notifications, we need a way to keep track of the device tokens on a per-user basis - Firestore is an excellent choice for this task. After the user has logged-in, associate the device token in a subcollection located at users/{userID}/tokens/{token}. The token itself is just a string, which can be used to enforce uniqueness on the Firestore document by using it as the doc ID.
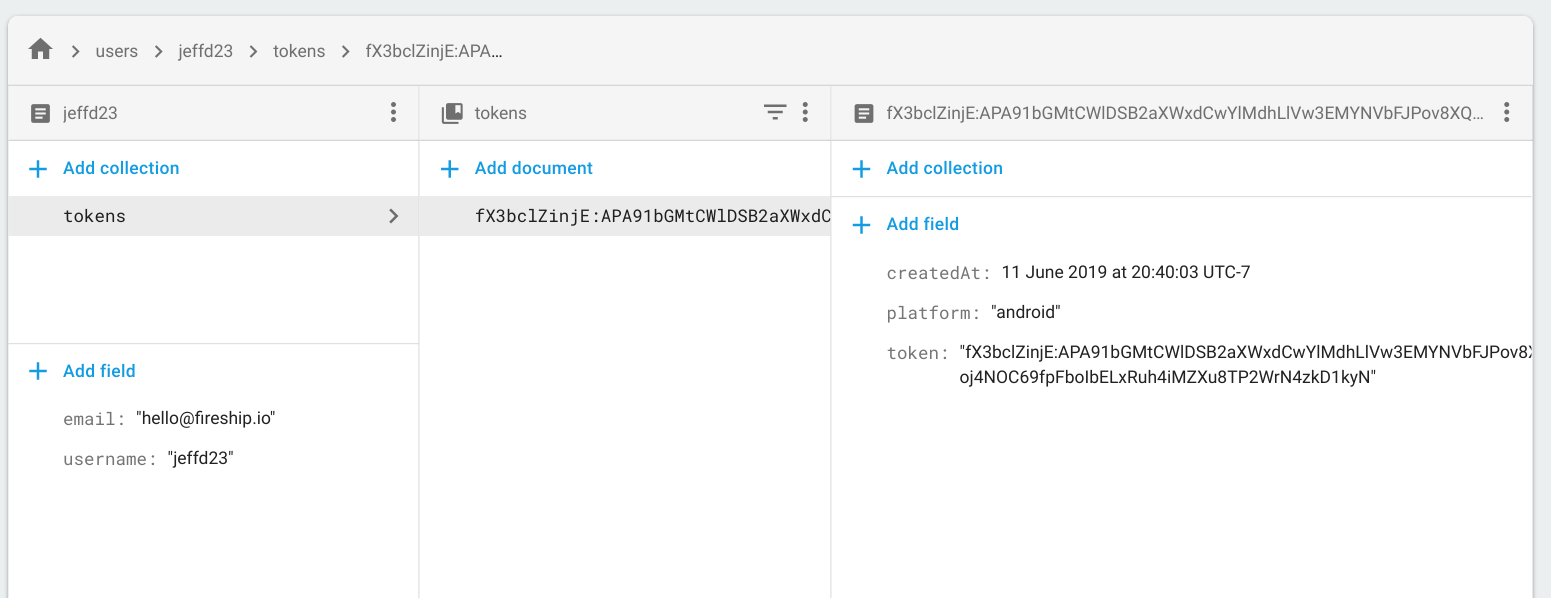
Firestore data model for managing single device FCM tokens
  /// Get the token, save it to the database for current user
  _saveDeviceToken() async {
    // Get the current user
    String uid = 'jeffd23';
    // FirebaseUser user = await _auth.currentUser();

    // Get the token for this device
    String fcmToken = await _fcm.getToken();

    // Save it to Firestore
    if (fcmToken != null) {
      var tokens = _db
          .collection('users')
          .document(uid)
          .collection('tokens')
          .document(fcmToken);

      await tokens.setData({
        'token': fcmToken,
        'createdAt': FieldValue.serverTimestamp(), // optional
        'platform': Platform.operatingSystem // optional
      });
    }
  }
Step 2: Send Messages with NodeJS (Backend)
You can send messages with any of the Firebase Admin SDKs, but NodeJS with TypeScript is a solid option for Flutter developers.
firebase init functions

cd functions
Next, initialize the Admin SDK in your Cloud Functions code.
import * as functions from 'firebase-functions';
import * as admin from 'firebase-admin';
admin.initializeApp();

const db = admin.firestore();
const fcm = admin.messaging();
Send to Topic
When it comes to topic-based notifications, you will often send the message in response to an event in the database. For example, when a new document is created in puppies collection, we may want to notify all users subscribed to the puppies FCM topic.
export const sendToTopic = functions.firestore
  .document('puppies/{puppyId}')
  .onCreate(async snapshot => {
    const puppy = snapshot.data();

    const payload: admin.messaging.MessagingPayload = {
      notification: {
        title: 'New Puppy!',
        body: `${puppy.name} is ready for adoption`,
        icon: 'your-icon-url',
        click_action: 'FLUTTER_NOTIFICATION_CLICK' // required only for onResume or onLaunch callbacks
      }
    };

    return fcm.sendToTopic('puppies', payload);
  });
Send to Device
Device notifications may also be tied to a database event, but are more likely to be related to a specific user. For example, let’s imagine we have an orders collection and want notify a seller when a new order has been finalized. In this case, we will query the tokens subcollection under the user, then send a notification to all of their device tokens.
export const sendToDevice = functions.firestore
  .document('orders/{orderId}')
  .onCreate(async snapshot => {


    const order = snapshot.data();

    const querySnapshot = await db
      .collection('users')
      .doc(order.seller)
      .collection('tokens')
      .get();

    const tokens = querySnapshot.docs.map(snap => snap.id);

    const payload: admin.messaging.MessagingPayload = {
      notification: {
        title: 'New Order!',
        body: `you sold a ${order.product} for ${order.total}`,
        icon: 'your-icon-url',
        click_action: 'FLUTTER_NOTIFICATION_CLICK'
      }
    };

    return fcm.sendToDevice(tokens, payload);
  });