
Flutter Realtime Geolocation Firebase
Looking to build a realtime geolocation app like Lyft, Postmates, or Waze? It is easier than you might think when you combine the power of Flutter, Google Maps, and Firebase. The following lesson will show you how use Google Maps in Flutter, then listen to a realtime feed of geolocation data in Firestore queried by its distance from a centerpoint - made possible by the GeoFlutterFire package.
Special thanks to Darshan Gowda for creating the GeoFlutterFire library and providing the example code for this lesson.
Step 0: Prerequisites
- Install FlutterFire
- Install Flutter Google Maps
Initial App Setup
Our Flutter app starts with a Material Scaffold and uses a single StatefulWidget as the body.
import 'package:flutter/material.dart';
import 'package:google_maps_flutter/google_maps_flutter.dart';

void main() => runApp(MyApp());

class MyApp extends StatelessWidget {
  @override
  Widget build(BuildContext context) {
    return MaterialApp(
        home: Scaffold(
          body: FireMap()
      )
    );
  }
}

class FireMap extends StatefulWidget {
  @override
  State createState() => FireMapState();
}


class FireMapState extends State<FireMap> {
  @override
  build(context) {
    // widgets go here
  }
}
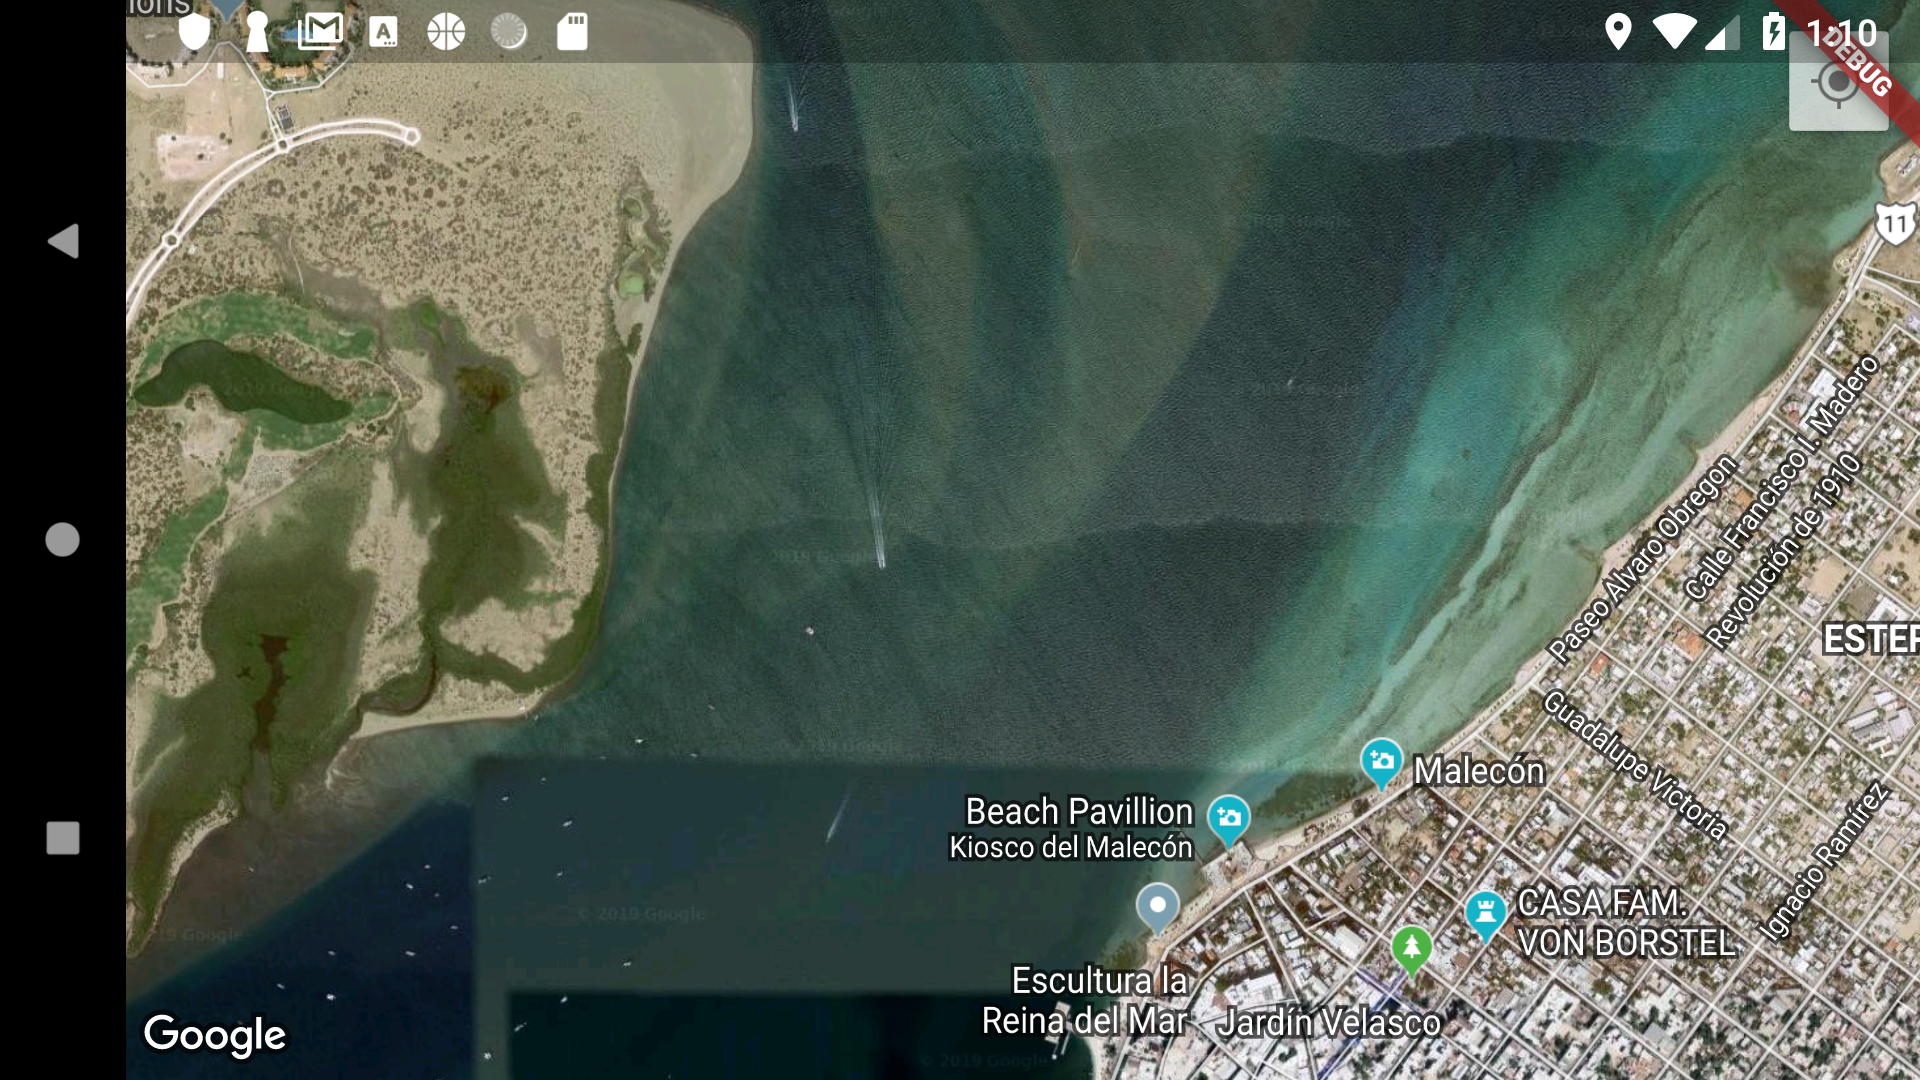
Step 1: Create a Perfectly Centered Map
First, let’s create a full screen map and center it on the screen.
Map Stack
In my opinion, a good map UI sets the map canvas on the entire screen, then overlays additional controls as needed. This is a perfect use-case for a Flutter Stack widget. Our map will sit on the bottom of stack and we’ll overlay a FlatButton and Slider on top of it.
When initializing a GoogleMap widget, we are required to set the initialCameraPosition, but I also included a handful of additional options you might want to use. You will very likely want to setup a mapController to change the camera position and add markers.
class FireMapState extends State<FireMap> {
  GoogleMapController mapController;

  build(context) {
    return Stack(
      children: [
        GoogleMap(
          initialCameraPosition: CameraPosition(target: LatLng(24.150, -110.32), zoom: 10),
          onMapCreated: _onMapCreated,
          myLocationEnabled: true, // Add little blue dot for device location, requires permission from user
          mapType: MapType.hybrid,
          trackCameraPosition: true
        ),
      ]
    );
  }

  void _onMapCreated(GoogleMapController controller) {
    setState(() {
      mapController = controller;
    });
  }
}
Overlay Custom Controls
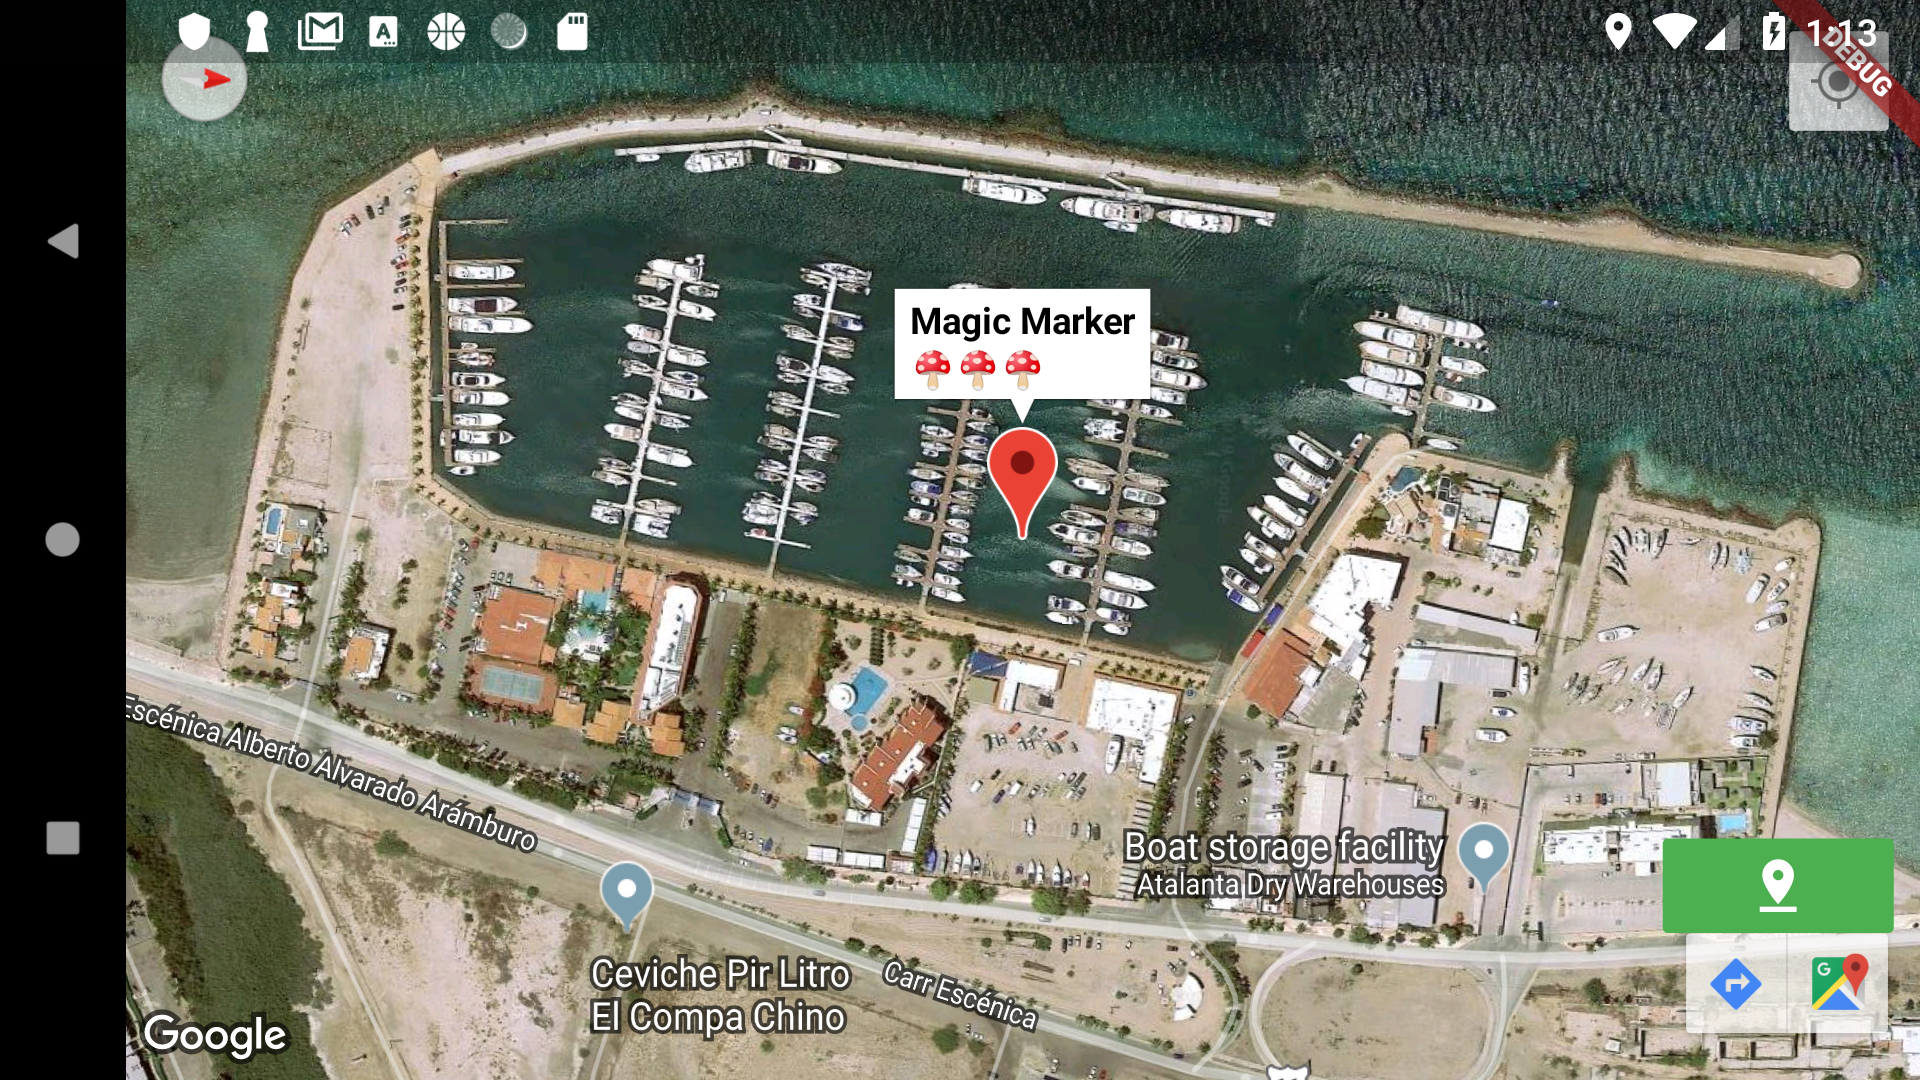
Let’s extend the map by overlaying a button that creates a marker when tapped.
build(context) {
    return Stack(
      children: [
        GoogleMap(...),
        Positioned(
          bottom: 50,
          right: 10,
          child:
          FlatButton(
            child: Icon(Icons.pin_drop),
            color: Colors.green,
            onPressed: () => _addMarker()
          )
      )
}

_addMarker() {
  var marker = Marker(
    position: mapController.cameraPosition.target,
    icon: BitmapDescriptor.defaultMarker,
    infoWindowText: InfoWindowText('Magic Marker', '🍄🍄🍄')
  );

  mapController.addMarker(marker);
}
Now we have a map with a little bit of interactivity. Move the camera around, then click the buttom in the bottom right and it will place an marker on the map.
Step 2: Obtain the User’s Device Location
At this point, we need a way track the user’s position via the GPS system. Let’s install the Flutter Location package.
The location service is used in serval parts of the app, but a cool demonstration is to animate the map to the current user’s location, for example:
  Location location = new Location();

  _animateToUser() async {
    var pos = await location.getLocation();

    mapController.animateCamera(CameraUpdate.newCameraPosition(
      CameraPosition(
          target: LatLng(pos.latitude, pos.latitude),
          zoom: 17.0,
        )
      )
    );
  }
Step 3: Writing GeoPoints to Firestore
At this point, we’re able to place markers on the map, but they’re not persisted in a database and will be lost when the app loses its current state. In this section, we save a GeoFirePoint - which consists of the latitude, longitude, and a geohash - to Firestore so that it can be queried with GeoFlutterFire.
Let’s start by making a reference to Firestore and GeoFlutterFire.
class FireMapState extends State<FireMap> {
  // omitted...

  Firestore firestore = Firestore.instance;
  Geoflutterfire geo = Geoflutterfire();

  // ...
}
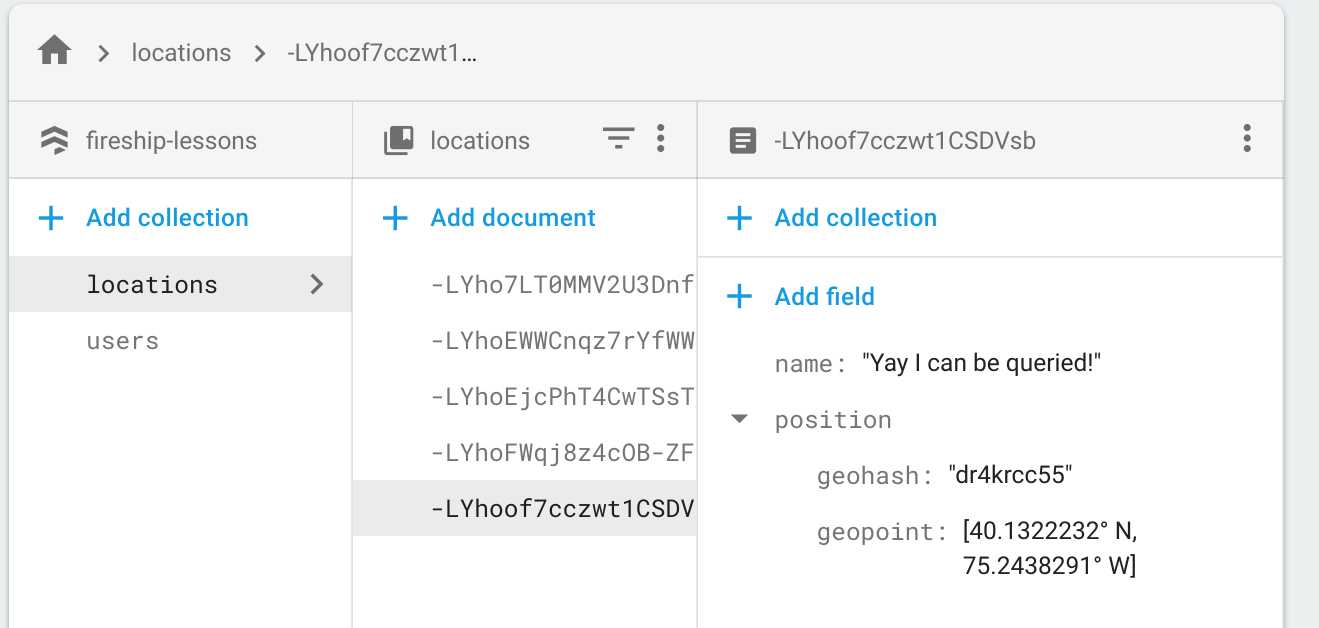
Next, add a method that writes to the database. This correct data strucutre with a geohash is created for you automatically when you pass the point.data with the Firestore document data.
Future<DocumentReference> _addGeoPoint() async {
  var pos = await location.getLocation();
  GeoFirePoint point = geo.point(latitude: pos.latitude, longitude: pos.longitude);
  return firestore.collection('locations').add({
    'position': point.data,
    'name': 'Yay I can be queried!'
  });
}
Step 4: Querying Realtime Geolocation Data
The final step is to listen to stream of data from Firestore and update the marker positions in realtime.
Add Stateful Data
We have two pieces of streaming data in this demo (1) the radius of the query in kilometers and (2) the result of the query from Firestore. The radius is modeled as an RxDart BehaviorSubject, which is just a stream that has a current value and can have new values pushed to it.
You might also want to listen to the user’s location in realtime and update your query reactively, which you can do with location.onLocationChanged().
  BehaviorSubject<double> radius = BehaviorSubject(seedValue: 100.0);
  Stream<dynamic> query;
  StreamSubscription subscription;
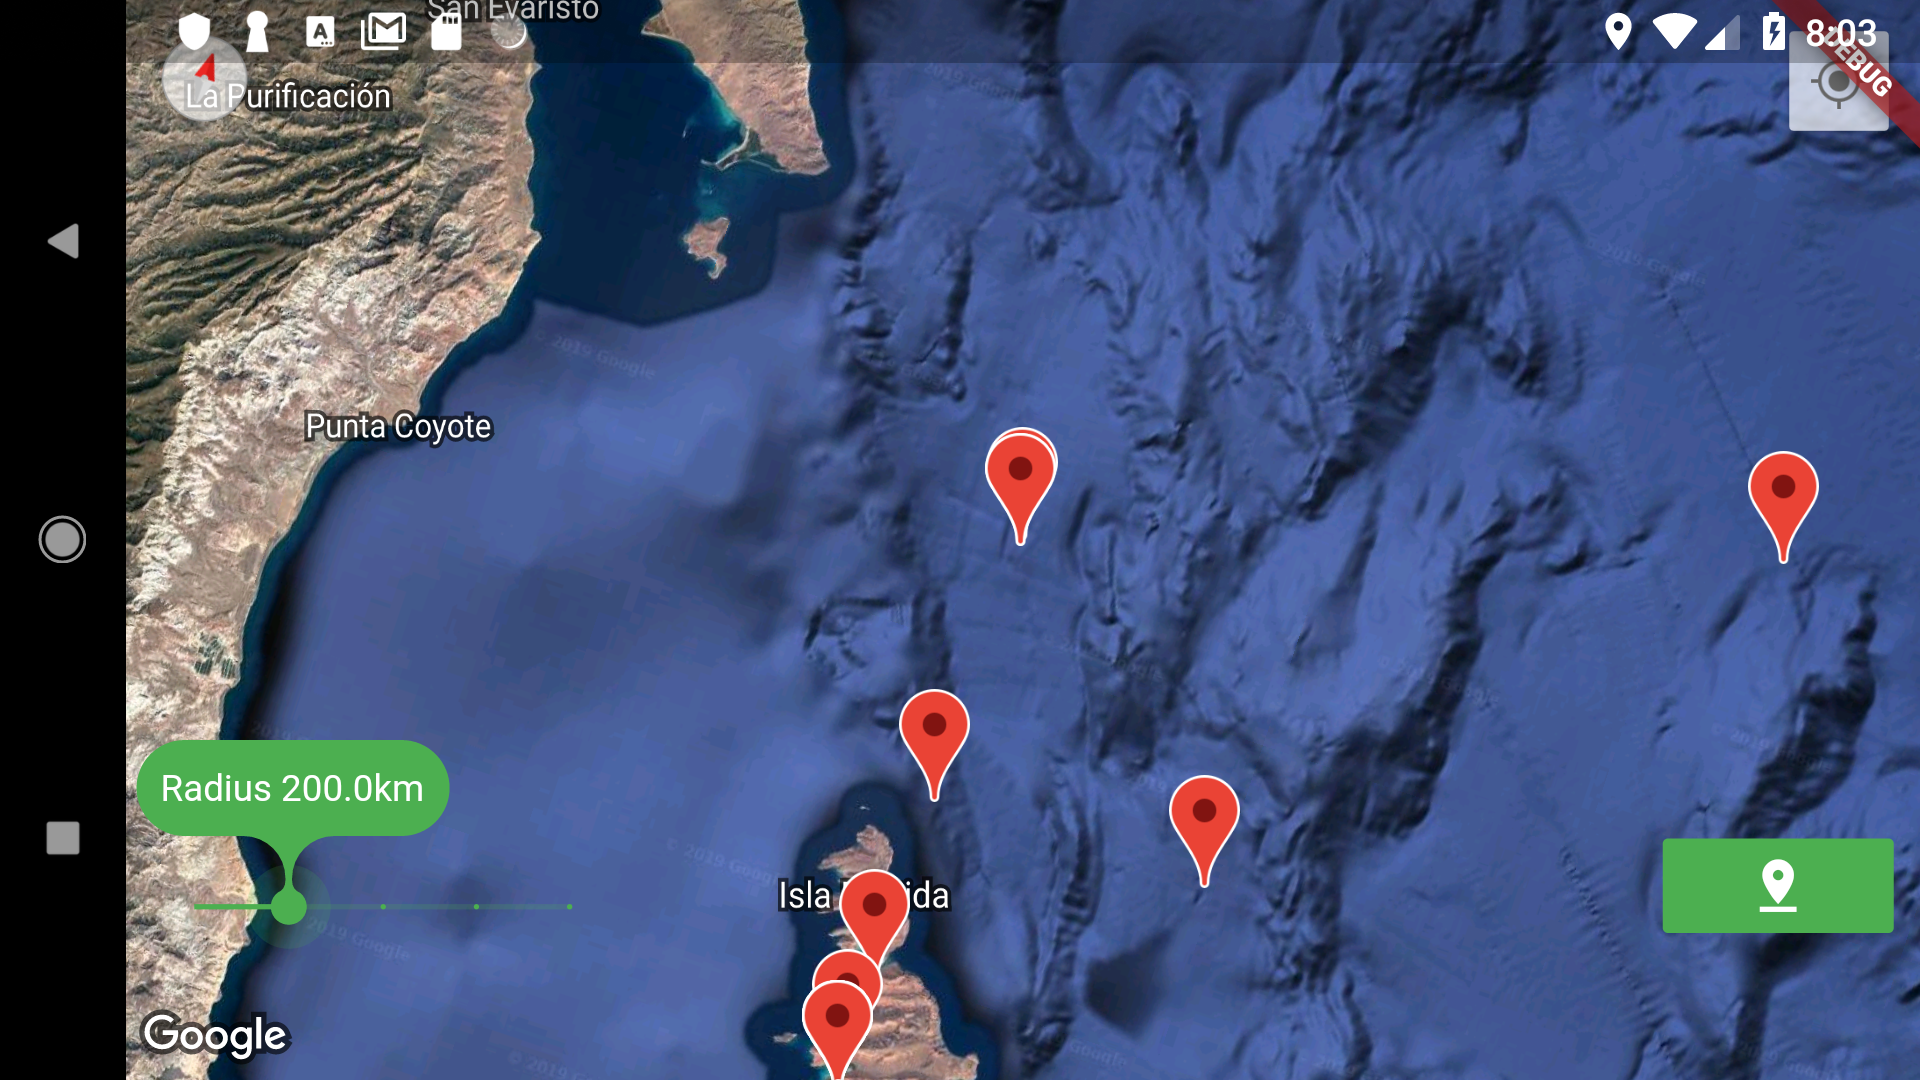
Add a Slider to Control the Radius
The Slider widget will allow the user to manually change the radius of the query.
  build(context) {
    return Stack(children: [
      // ... other widgets
      Positioned(
        bottom: 50,
        left: 10,
        child: Slider(
          min: 100.0,
          max: 500.0,
          divisions: 4,
          value: radius.value,
          label: 'Radius ${radius.value}km',
          activeColor: Colors.green,
          inactiveColor: Colors.green.withOpacity(0.2),
          onChanged: _updateQuery,
        )
      )
    ]);
Update Markers with Firestore Data
The method below takes a list of documents from Firestore and updates the position of the map markers. Firebase emits all the documents after each change, so we start by clearing all markers from the map, then looping over the latest data to create new markers.
 void _updateMarkers(List<DocumentSnapshot> documentList) {
    print(documentList);
    mapController.clearMarkers();
    documentList.forEach((DocumentSnapshot document) {
        GeoPoint pos = document.data['position']['geopoint'];
        double distance = document.data['distance'];
        var marker = Marker(
          position: LatLng(pos.latitude, pos.longitude),
          icon: BitmapDescriptor.defaultMarker,
          infoWindowText: InfoWindowText('Magic Marker', '$distance kilometers from query center')
        );


        mapController.addMarker(marker);
    });
  }
And now it’s finally time to make the query to Firestore. The _startQuery method creates a subscription with the default radius, then uses switchMap to get the correct items from the database. The listen callback will repaint the markers whenever the radius changes or the underlying data changes.
  _startQuery() async {
    // Get users location
    var pos = await location.getLocation();
    double lat = pos.latitude;
    double lng = pos.longitude;


    // Make a referece to firestore
    var ref = firestore.collection('locations');
    GeoFirePoint center = geo.point(latitude: lat, longitude: lng);

    // subscribe to query
    subscription = radius.switchMap((rad) {
      return geo.collection(collectionRef: ref).within(
        center: center,
        radius: rad,
        field: 'position',
        strictMode: true
      );
    }).listen(_updateMarkers);
  }

  _updateQuery(value) {
      setState(() {
        radius.add(value);
      });
  }
Cancel the Subscription
A geoquery is the type of stream that can cause memory links. Under the hood, GeoFlutterFire is combining multiple queries together and listening to all of them concurrently. If you have highly active writes happening in the database this could cost you money and tank the performance of the app. Make sure to cancel the stream when the widget is destroyed.
  @override
  dispose() {
    subscription.cancel();
    super.dispose();
  }
The End
This entire demo is only take about 180 lines of code - pretty amazing considering we have basic realtime geolocation ready for both iOS and Android. It could be improved by extracting the data sources from the StatefulWidget into an InheritedWidget so other screens can share the same geoquery data.