
Flutter Widget Positioning - A Guide for the CSS Developer
The addition of Flexbox to CSS revolutionized the way we position elements on the web. It makes the alignment of elements on a 2D plane automatic and well, flexible. Fortunately, Flutter uses the same principles for aligning widgets with Flex, Column, and Row. In addition, it supports absolute and fixed positioning with Stack.
The following lesson will teach you how to position containers and build layouts in Flutter with direct comparisons to CSS Flexbox.
Throughout this lesson, you will see the 👉 emoji. Flutter will always be on the left, and CSS on the right.
Make sure to also watch Flutter for the JavaScript Developer.
Basic Positioning for Single Widgets
Do you need to position one widget or multiple widgets? If you answered one, you likely want to wrap your widget with a Container.
Container
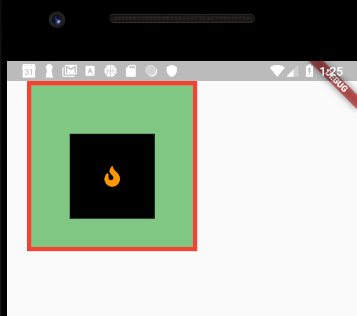
Containers serve as an all-purpose wrapper for positioning and styling widgets. They are similar to an HTML div in the sense that they serve as blank UI elements that can be positioned/styled. Below is a list of the most common positioning options.
Container(
    width: 100,
    height: 100,
    margin: EdgeInsets.all(24),
    padding: EdgeInsets.only(top: 24),
    alignment: Alignment.center,
    transform: Transform.rotate(...),
    child: MyCoolWidget()
)
The equivalent HTML/CSS would look something like this:
.my-cool-widget {
    width: 100px;
    height: 100px;
    margin: 24px;
    padding-top: 24px;
    text-align: center;
}
/*  <div class="my-cool-widget"></div>  */
Padding, Center, Align, and More
In many cases, you will not need the full kitchen-sink of features in a container. For example, when you only need to provide padding to a widget, consider using the Padding widget, or if you just want to center a widget wrap it in Center. It will make your code more readable and succinct.
Padding(
    padding: EdgeInsets.all(24),
    child: MyCoolWidget()
)

Center(
    child: MyCoolWidget()
)
CSS Flexbox vs Flutter Rows and Columns
A Basic Row & Column
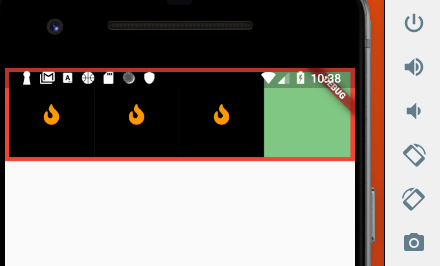
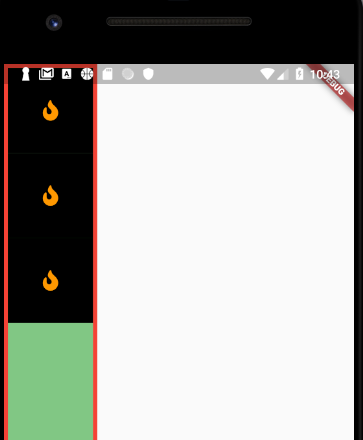
Rows and Columns are identical in every way, just with their axis flipped.
Column(
    children: [
        MyWidget(),
        MyWidget(),
        MyWidget()
    ]
);

// or swap a Column for a Row to flip the axis

Row(children: [ ]);

// and this is all just sugar for the Flex widget
Flex(
    direction: Axis.vertical
)
MainAxis vs CrossAxis
mainAxisAlignment👉align-items;crossAxisAlignment👉justify-content;
In Flutter, you might find yourself asking should I set the mainAxisAlignment or crossAxisAlignment. The answer depends whether you’re aligning a Row or Column.
The MainAxis runs along the flow or direction of the widgets, so X-axis for Rows and Y-axis for Columns. The CrossAxis is the opposite.
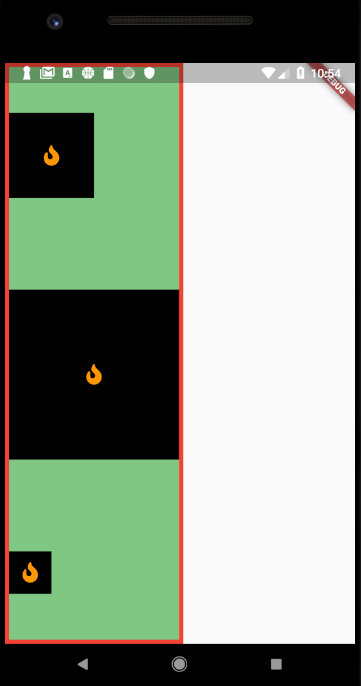
On the main-axis, you control the spacing between the widgets. On the cross-axis, you control the alignment within the parent container.
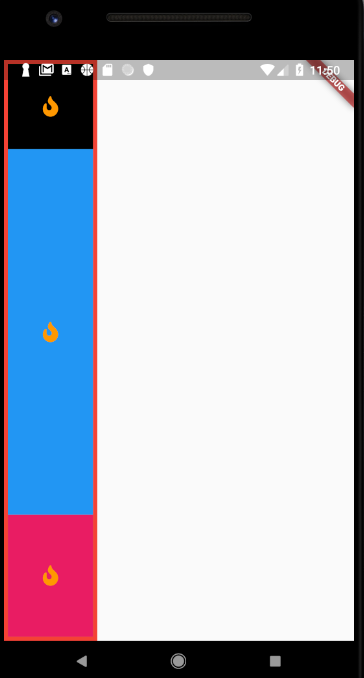
Column(
    mainAxisAlignment: MainAxisAlignment.spaceAround,
    crossAxisAlignment: CrossAxisAlignment.start,
    children: [
        MyWidget(),
        MyWidget(height: 200.0, width: 200.0),
        MyWidget(height: 50.0, width: 50.0)
    ]
);
In CSS we can achieve the same effect with a flex row or column.
.row {
    display: flex;
    flex-direction: row;
    justify-content: space-around;
    align-items: flex-start;
}
Expanded
Sometimes you need to specify flex behavior from a child widget. The Expanded widget will take up the remaining space of a row or column. It takes an optional flex argument to control the ratio of space used when working with multiple expanded widgets.
Notice how the middle widget has a flex of 3, while the last widget has a flex of 1. This means the middle widget will take up 3x more space. In other words, it will expand to 75% of the available space, while the last widget will take up the remaining 25%.
Column(
    children: [
        MyWidget(),
        Expanded(
            flex: 3,
            child: MyWidget(),
        ),
        Expanded(
            flex: 1,
            child: MyWidget()
        )
    ]
);
}
The CSS equivalent:
.column {
    display: flex;
    flex-direction: column;
}

.expanded1 {
    flex-grow: 1;
}

.expanded3 {
    flex-grow: 3;
}
Stacks vs Absolute/Fixed Positioning
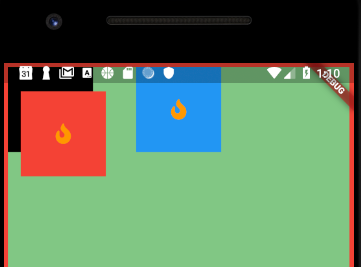
A Stack allows you to stack elements on top of each other, with the last element in the array taking the highest prority. You can use Align, Positioned or Container to position the children of a stack.
Align
Widgets are moved by setting the alignment with Alignment, which has static properties like topCenter, bottomRight, and so on. Or you can take full control and set Alignment(1.0, -1.0), which takes x,y values ranging from 1.0 to -1.0, with (0,0) being the center of the screen.
Stack(
    children: [
        MyWidget(),
        Align(
            alignment: Alignment.topCenter,
            child: MyWidget(),
        ),
        Container(
            alignment: Alignment(-0.9, -0.9),
            child: MyWidget(),
        )
    ]
);
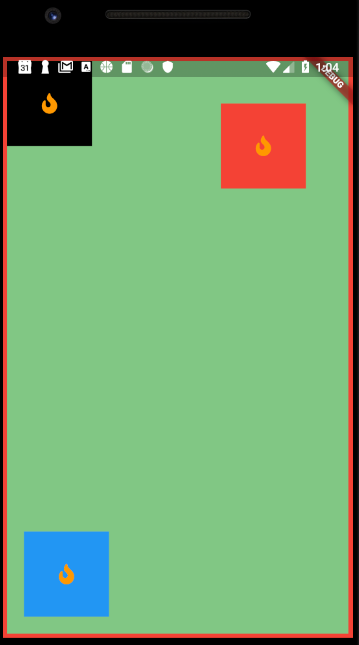
Positioned
As an alternative to align, you can position children relative to the parent widget.
Stack(
    children: [
        MyWidget(),
        Positioned(
            bottom: 20,
            left: 20,
            child: MyWidget(color: Colors.blue),
        ),
        Positioned(
            top: 50,
            right: 50,
            child: MyWidget(color: Colors.red)
        )
    ]
)
And with CSS absolute positioning.
.positioned {
    position: absolute;
    bottom: 20,
    left: 20,
}
The End
As you can see, CSS shares many of the same positioning and alignment concepts with Flutter. In 99% of cases, you can solve your positioning requirements with Container, Column, Row, and Stack. The beauty of Flutter is that you have the power to paint every pixel on the device when needed in more advanced scenarios.