
Access Google APIs for Users with OAuth 2.0
How do you make APIs calls to a Google service on behalf of a user? The following lesson demonstrates how to get permission from a user with OAuth 2.0 to make authenticated requests to Google APIs from a backend Node.js server like Firebase Cloud Functions.
Examples of common use cases might include:
- Upload a file to a user’s Google Drive
- Make an appointment on a user’s Google Calendar
- Access a user’s infrastructure on Google Cloud Platform
💡 Note: This lesson covers server-side OAuth. An alternative approach is client-side OAuth, which you can learn about in the Google Calendar gapi lesson.
How it OAuth 2.0 Works in Node
There are several steps required to implement OAuth on the server.
- Server-side: Generate an OAuth URL with desired scopes.
- Client-side: Authenticate the user, then send the resulting authorization
codeback to your server. - Server-side: Use the authorization code to generate an Access Token and Refresh Token. Save it to the database.
- Server-side: Use the tokens then make an API call on the user’s behalf.
The Access Token is the value used to authenticate the actual API call, but it might be revoked or expire, in which case the user needs to re-authenticate.
When the Access Token expires, the Refresh Token can be used to generate a new one. However, at the time of this article, you cannot generate an Refresh Token for offline use with Firebase directly. This means apps that make API calls in the background (i,e scheduled Google Calendar update) will need to handle the auth flow server-side.
Enable the APIs
Make sure to enable the APIs on Google Cloud that you intend to use.
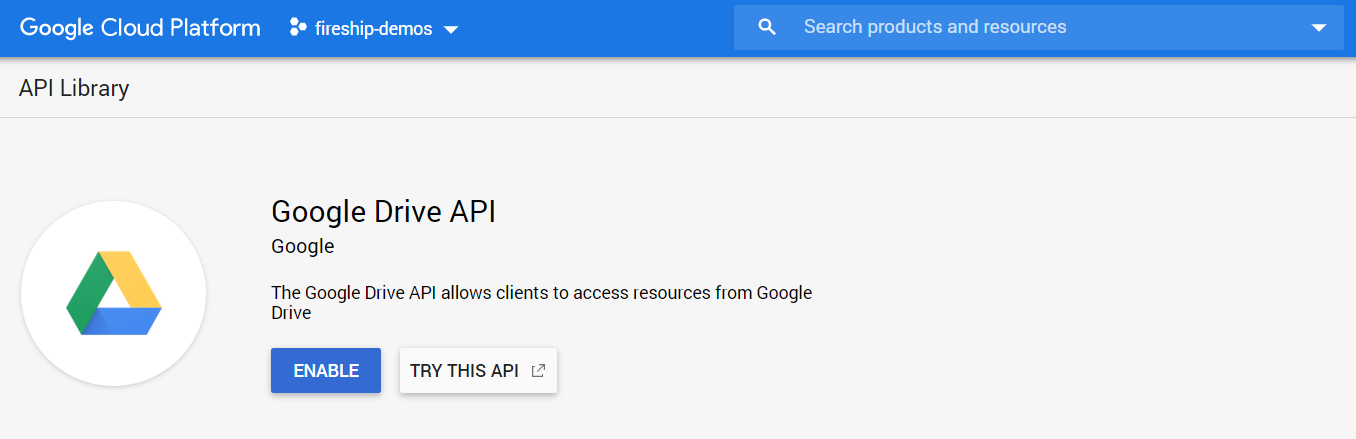
Enable the Google Drive API for example
Install Google APIs for Node
This demo assumes you have a server or cloud function with firebase-admin installed. Install googleapis to work with any Google API and OAuth.
npm install googleapis
Step 1 - Generate the Sign In URL
Find your OAuth Credentials
Copy your OAuth client ID, secret, and a redirect. These should use set as environment variables on the server.
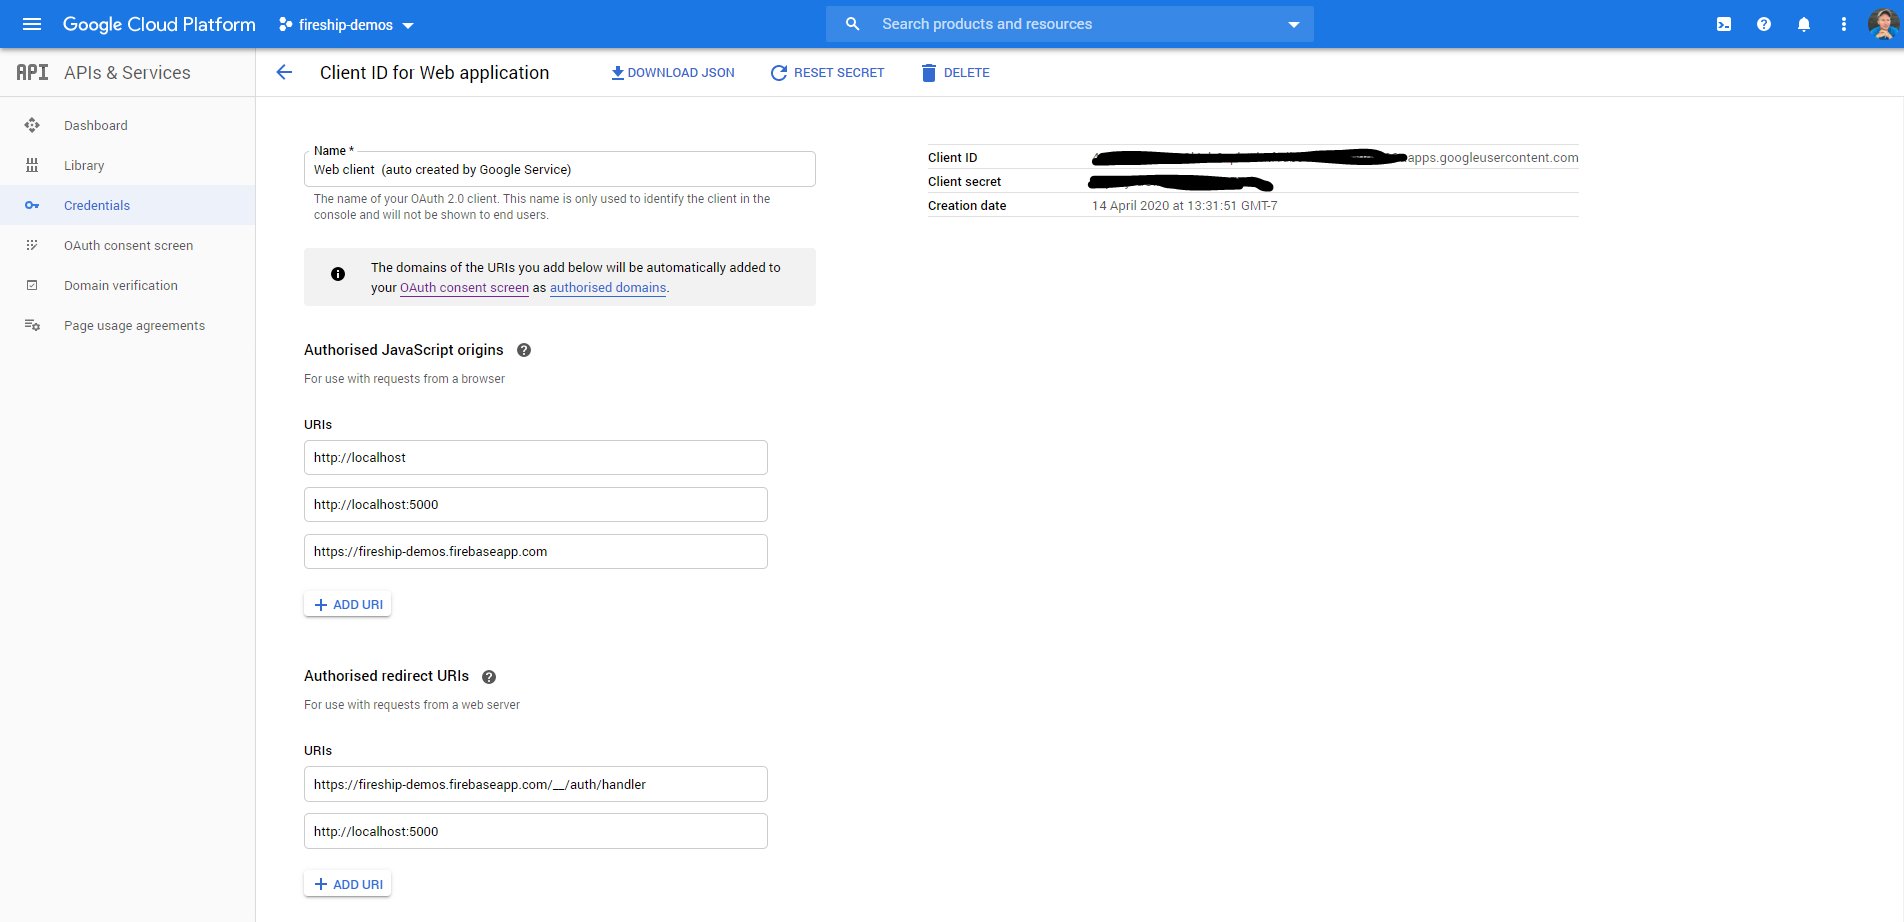
Notice the credentials in the top right
You can also customize the consent screen to include the required scopes for your app.
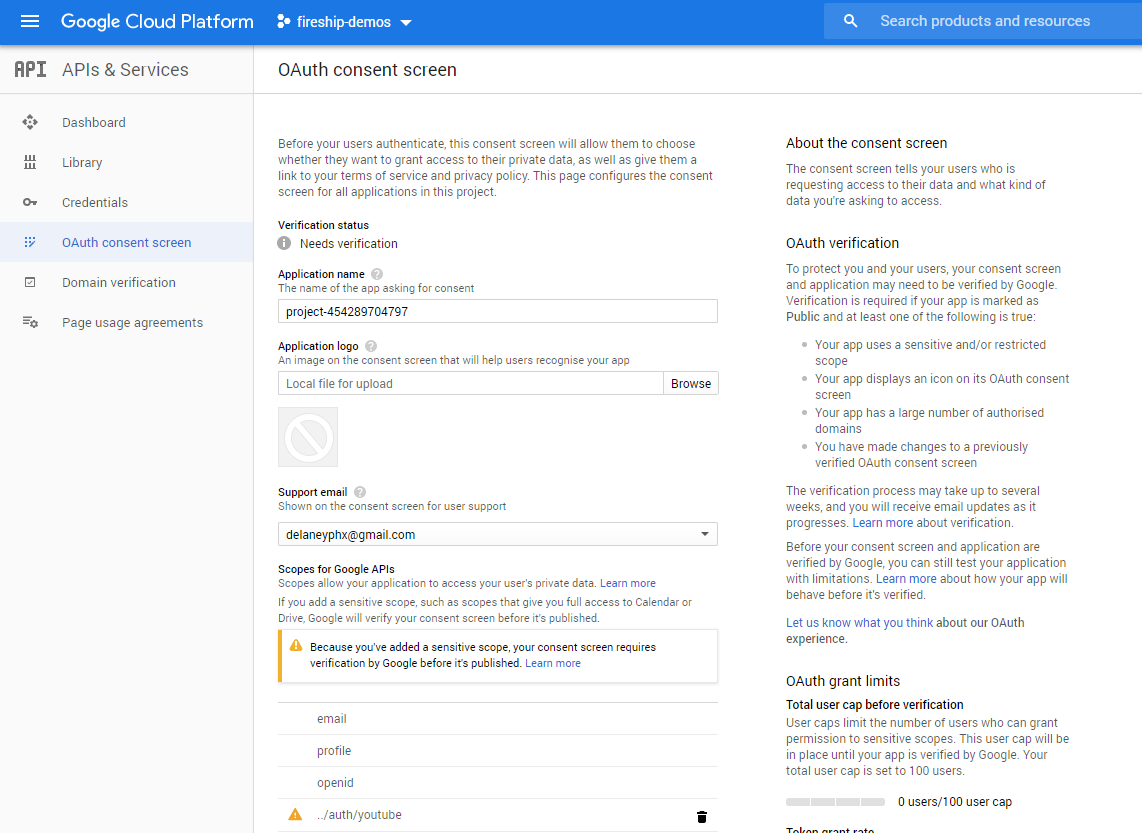
Customize the consent screen
Initialize the OAuth Client
Initialize the OAuth client.
const functions = require('firebase-functions');
const admin = require('firebase-admin');
admin.initializeApp();

const { google } = require('googleapis');

const oauth2Client = new google.auth.OAuth2(
    'CLIENT_ID.apps.googleusercontent.com',
    'CLIENT_SECRET',
    'REDIRECT_URI',
  );
Generate the OAuth URL
You can generate an OAuth URL. It is important to set the access_type as offline if you plan on making API requests in the background when the user is not actively using the app.
exports.getAuthURL = functions.https.onRequest(async (req, res) => {


      const scopes = [
        'profile',
        'email',
        'https://www.googleapis.com/auth/youtube', // <-- sensitive scope
      ];

      const url = oauth2Client.generateAuthUrl({
        access_type: 'offline',
        scope: scopes
      });


      res.send(url);

});
Step 2 - Authenticate the User
The result of the getAuthURL method is a URL that looks like this: https://accounts.google.com/o/oauth2/v2/auth?.... In your frontend app, you can redirect the user or open it in a popup.
Get the Code from the Redirect
After signing in, Google will redirect the user to the REDIRECT_URI you specified in step 1. You can access the auth code from the url params in the browser, for example:
https://yourcoolsite.com/auth?code=4/abc...
    const url = new URL(window.location);
    const code = url.searchParams.get('code');
    console.log(code);

    // Send to your backend
    await fetch('https://your-server.com/createAndSaveTokens', { body: { code } });
Step 3 - Generate Auth Tokens
The server-side application will receive the code then create the access and refresh tokens.
Save the Tokens to a Database
Use the code to generate the tokens, then save them to your database.
exports.createAndSaveTokens = functions.https.onRequest(async (req, res) => {

    const code =  req.body.code; //
    const { tokens } = await oauth2Client.getToken(code);
    const { refresh_token, access_token } = tokens;


    // Save to database
    await admin.firestore().doc('tokens/someUserID').set({ refresh_token })

    res.send('success')

});
Step 4 - Make an API Call
You now have the ability to make API calls for the user.
Example with Google Drive
Retrieve the credentials from the Database, set them on the OAuth Client, then make a request to you desired Google API.
function doSomething() {

    const tokens = (await admin.firestore().doc('tokens/someUserID').get() ).data();
    oauth2Client.setCredentials(tokens)

    const drive = google.drive({
        version: "v3",
        auth: oauth2Client
    })


    const newFile = await drive.files.create();
}