Ionic Intro Slider for New Users
A useful intro slider is a sign of a highly polished mobile app. A quick tutorial for using your app provides an excellent user experience and can reduce bounce rates for new users.
In the following lesson, you will learn how to use the slider component in Ionic 4 to build a multi-step introduction that educates users how to use your app.

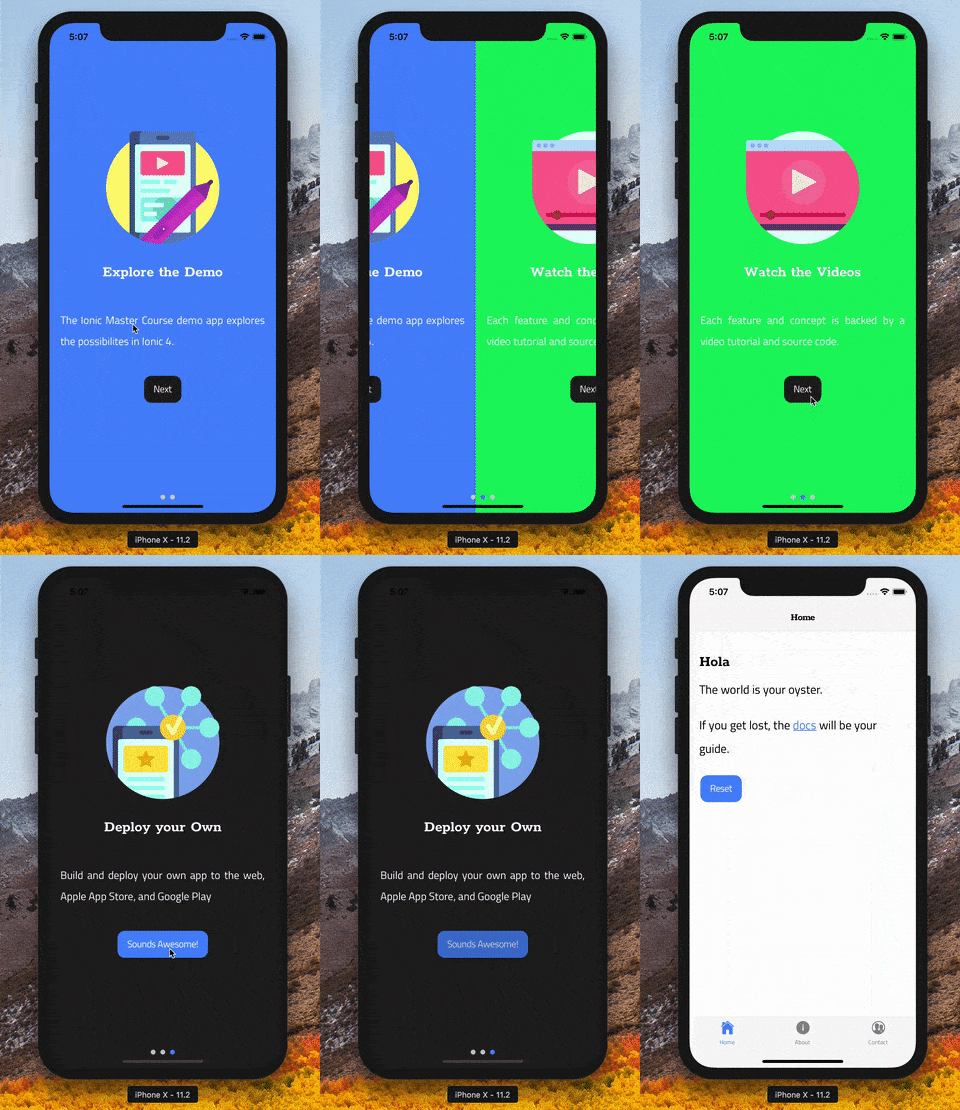
Ionic slides as an app tutorial for new users
Basics
Overall, the logic behind an app intro is quite simple.
- New user installs the app.
- The user completes the tutorial, saving the status on the local device storage.
- All future visits will bypass the tutorial.
How do we know if the user has completed the tutorial on future visits? In this case, we will save the state with Ionic Storage as a boolean. Storing this data allows us to persist information about the tutorial status after the user closes the app and/or refreshes the browser window.
ionic cordova plugin add cordova-sqlite-storage
npm install --save @ionic/storage
Then import Ionic Storage in your app.module.ts
import { IonicStorageModule } from '@ionic/storage';

@NgModule({
  imports: [
    BrowserModule,
    IonicModule.forRoot(MyApp),
    IonicStorageModule.forRoot() // <-- here
  ]
})
export class AppModule {}
If your app requires user authentication, you might also save the tutorial state on their account. For example, a Firebase app could save this data in the Firestore database.
Routing to the Intro Slider
Ionic 4 takes advantage of the Angular Router, making it much easier to maintain complex navigation logic. This feature uses an Angular Guard, which is just an injectable service that can control when a route is able to be accessed. Let’s start by generating a new lazy-loaded page with the Ionic CLI:
ionic generate page
Router Guard
A Guard is just an Angular service - or injectable - that controls the behavior of the router in a maintainable way. Let’s generate it with the CLI:
ionic generate guard guards/tutorial
The guard contains a special canActivate method that we are required to implement that must return or resolve to a boolean value. Because Ionic Storage is Promise-based, we can just make it an async function. Its job is to read the tutorialComplete value from the device storage. If true it allows the route to active, but if false it will block the route and redirect to the tutorial.
// ...omitted
import { Storage } from '@ionic/storage';

@Injectable({
  providedIn: 'root'
})
export class TutorialGuard implements CanActivate {

  constructor(private storage: Storage, private router: Router) {}

  async canActivate(
    next: ActivatedRouteSnapshot,
    state: RouterStateSnapshot
  ): Promise<boolean> {

    const isComplete = await this.storage.get('tutorialComplete');

    if (!isComplete) {
      this.router.navigateByUrl('/tutorial');
    }

    return isComplete;
  }
}
Applying the Guard
A huge advantage of a Guard is that we can apply the same logic to multiple routes. In this case its a moot point because we have only have one route, but you get the idea. Let’s go ahead and protect our root route by applying the Guard in the app-routing.module.
import { Routes, RouterModule } from '@angular/router';
import { TutorialGuard } from './guards/tutorial.guard';

const routes: Routes = [
  {
    path: '',
    loadChildren: './tabs/tabs.module#TabsPageModule',
    canActivate: [TutorialGuard] // <-- apply here
  },
  {
    path: 'tutorial',
    loadChildren: './tutorial/tutorial.module#TutorialPageModule'
  }
];
@NgModule(...)
export class AppRoutingModule {}
Designing an App Slider Tutorial
A tutorial for new app users should be as simple as possible - KISS. You don’t want to bounce a user because they get frustrated plowing through a long complex set of instructions. In the following steps, we will build out the markup for the slider and create a button that finishes the tutorial permanently.

Slides HTML
The slider HTML is simple. It uses an outer ion-slides component, which controls multiple inner ion-slide child components. By default, the nested slides with swipe from first to last based on their order in the HTML.
<ion-slides pager="true">
    <ion-slide class="step-one">
        <ion-img src="/assets/slides/step1.svg"></ion-img>
        <h1>Heading</h1>
        <p>Text</p>
    </ion-slide>

    <ion-slide class="step-two">
        <ion-img src="/assets/slides/step2.svg"></ion-img>
        <h1>Heading</h1>
        <p>Text</p>
    </ion-slide>

    <ion-slide class="step-three">
        <ion-img src="/assets/slides/step3.svg"></ion-img>
        <h1>Heading</h1>
        <p>Text</p>

        <ion-button (click)="finish()">FINISH TUTORIAL!</ion-button>
    </ion-slide>
</ion-slides>
Making it Responsive with CSS
Most components are flexbox-based in Ionic 4, giving us a solid amount of control over responsiveness. I made a few adjustments to the default slides to make them display at the full height of the viewport, but also gave each slide a unique background color.
ion-slide {
    height: 100vh;
    flex-direction: column;
}

ion-img {
    max-width: 50vw;
    max-height: 50vh;
    overflow: hidden;
}


.step-one {
    background: var(--ion-color-primary);
    color: var(--ion-color-primary-contrast);
}

.step-two {
    background: var(--ion-color-success);
    color: var(--ion-color-success-contrast);
}

.step-three {
    background: var(--ion-color-dark);
    color: var(--ion-color-dark-contrast);
}
Finishing the Tutorial
Our final step is to complete the tutorial by flipping the tutorialComplete value in Ionic Storage to true.
If you need to access API specific methods to control the slides, you can grab this [Ionic component from the DOM](/snippets/using-viewchild-in-ionic-4-to-call-component-methods) with ViewChild.
import { Component, OnInit, ViewChild } from '@angular/core';
import { Storage } from '@ionic/storage';
import { Router } from '@angular/router';

@Component(...)
export class TutorialPage {
  constructor(private storage: Storage, private router: Router) {}


  async finish() {
    await this.storage.set('tutorialComplete', true);
    this.router.navigateByUrl('/');
  }

}
The End
Pretty simple. An intro app tutorial can be a make-or-break feature for user engagement, especially if your app is not very approachable for noobs. If you have any questions leave a comment below:
