Push Notifications on the Web
A few months ago, I released a video covering Firebase Cloud Messaging (FCM) with the Realtime Database. Today, I am going to update this code with the following improvements:
- Save FCM tokens in Firestore.
- Send Firebase push messages to multiple devices simultaneously.
- Angular 5

firebase cloud messaging demo in angular
Setting Up Firebase Cloud Messaging in Angular
There are several steps you must take in Angular to get started with cloud messaging.
User Auth
Before you can take advantage of messaging, you need to have a user authentication system in place that can manage custom data. I recommend using my Firestore OAuth setup, but it’s not required. The important thing is that you have a custom user document in Firestore with an ID that matches the user’s auth UID. Here’s what our custom user interface looks like:
interface User {
  uid: string;
  email: string;
  photoURL?: string;
  displayName?: string;

  fcmTokens?: { [token: string]: true };
}
The fcmTokens will be mapped to the user document. The resulting document looks like this in plain JS. Each token represents a different device to which the user has granted messaging permission
{
  uid: 'userXYZ',
  fcmTokens: {
    tokenA: true,
    tokenB: true,
    //... and so on
  }
}
App Manifest
All progressive web apps must have a src/manifest.json file. The main part we care about here is the GCM sender ID. Keep in mind, this value is the same for ALL apps - do not use your unique Firebase messaging ID here.
{
  "short_name": "FireStarter",
  "name": "Angular4 + Firebase Starter App",
  "start_url": "/?utm_source=homescreen",

  "gcm_sender_id": "103953800507"
}
Then link it in the head of the index.html.
<head>
  <!-- omitted -->
  <link rel="manifest" href="/manifest.json">
</head>
Service Worker
Firebase makes the service worker code for push messaging dead simple. The worker just sits in the background and listens for messages. Make sure to use this exact name and file location: src/firebase-messaging-sw.js. You can retrieve the messagingSenderId from the Firebase admin console.
importScripts('https://www.gstatic.com/firebasejs/4.6.1/firebase-app.js');
importScripts('https://www.gstatic.com/firebasejs/4.6.1/firebase-messaging.js');
firebase.initializeApp({
  'messagingSenderId': 'YOUR_UNIQUE_SENDER_ID'
});
const messaging = firebase.messaging();
CLI Json
Lastly, register these files in angular-cli.json.
    "assets": [
      "assets",
      "favicon.ico",
      "firebase-messaging-sw.js", // <-- here
      "manifest.json" // <-- and here
    ]
Receive Push Messages in the Angular Front-end
There are several steps involved in receiving push messages.
- Get permission from the user on a given device.
- Update the permission token in Firestore
- Listen for new messages when the app is active.
All of this logic will be handled from a service:
ng generate service messaging
Here’s our initial service code to which we will be writing additional methods.
import { Injectable } from '@angular/core';
import { AngularFirestore } from 'angularfire2/firestore';
import { AuthService } from './auth.service';
import * as firebase from 'firebase';
import { Subject } from 'rxjs/Subject';


@Injectable()
export class MessagingService {

  private messaging = firebase.messaging()

  private messageSource = new Subject()
  currentMessage = this.messageSource.asObservable() // message observable to show in Angular component

  constructor(private afs: AngularFirestore) {}

  //...

}
1. Get Permission from the User
Every platform that sends push messages must first gain permission from the user. We’re going to be focused on the web using the JavaScript SDK, but similar principles apply to iOS and Android settings.
We are also going to monitor the token refresh. If the token changes, we will update it in Firestore to ensure the user still receives notifications.
  // get permission to send messages
  getPermission(user) {
    this.messaging.requestPermission()
    .then(() => {
      console.log('Notification permission granted.');
      return this.messaging.getToken()
    })
    .then(token => {
      console.log(token)
      this.saveToken(user, token)
    })
    .catch((err) => {
      console.log('Unable to get permission to notify.', err);
    });
  }

    // Listen for token refresh
  monitorRefresh(user) {
    this.messaging.onTokenRefresh(() => {
      this.messaging.getToken()
      .then(refreshedToken => {
        console.log('Token refreshed.');
        this.saveToken(user, refreshedToken)
      })
      .catch( err => console.log(err, 'Unable to retrieve new token') )
    });
  }
2. Save the Token in Firestore
Tokens are saved directly on the user document. You might also save them as a subcollection, but most users will only have 0 to 5 tokens, so the memory impact is miniscule. If the token already exists, then there is no need to run the update.
  // save the permission token in firestore
  private saveToken(user, token): void {

      const currentTokens = user.fcmTokens || { }

      // If token does not exist in firestore, update db
      if (!currentTokens[token]) {
        const userRef = this.afs.collection('users').doc(user.uid)
        const tokens = { ...currentTokens, [token]: true }
        userRef.update({ fcmTokens: tokens })
      }
  }
3. Receive Messages in Angular
When the app is closed, the web worker will transmit the message via the browser. However, this is not desirable when the user is actively working in the app. What we can do instead is listen for messages, then display the notification inside the app.
  // used to show message when app is open
  receiveMessages() {
    this.messaging.onMessage(payload => {
     console.log('Message received. ', payload);
     this.messageSource.next(payload)
   });

  }

firebase cloud messaging receive inside angular component
App Component
In this example, I am going to request permission from the user via the app component. First, I subscribe to the current user’s data. This only needs to be done once, so I am using take(1) to complete the subscription after receiving the first user document.
import { Component, OnInit } from '@angular/core';
import { MessagingService } from './core/messaging.service'
import { AuthService } from './core/auth.service';
import 'rxjs/add/operator/take';
import 'rxjs/add/operator/filter';


@Component({
  selector: 'app-root',
  templateUrl: './app.component.html',
  styleUrls: ['./app.component.sass']
})
export class AppComponent implements OnInit {

  constructor(public msg: MessagingService, public auth: AuthService) { }

  ngOnInit() {
    this.auth.user
    .filter(user => !!user) // filter null
    .take(1) // take first real user
    .subscribe(user => {
      if (user) {
        this.msg.getPermission(user)
        this.msg.monitorRefresh(user)
        this.msg.receiveMessages()
      }
    })
  }

}
User Specific Messaging to Multiple Devices
User specific messaging is used when something important happens to a single user. For example, a user might want to know when they are mentioned in a tweet or when their order has been shipped. In this example, are going to send a notification to users when they have received a new text message from another user.
FCM Cloud Function
Firebase Cloud Functions will serve as the backend environment for sending messages. The function will be triggered when a new message document is created in firestore. Each message has a recipientId and a senderId. The push notification will be broadcast the recipient’s devices.
const functions = require('firebase-functions');
const admin = require('firebase-admin');
admin.initializeApp();

exports.notifyUser = functions.firestore
const functions = require('firebase-functions');
const admin = require('firebase-admin');
admin.initializeApp();


exports.notifyUser = functions.firestore
    .document('messages/{messageId}')
    .onCreate(event => {

    const message = event.after.data();
    const userId = message.recipientId

    // Message details for end user
    const payload = {
        notification: {
            title: 'New message!',
            body: `${message.senderId} sent you a new message`,
            icon: 'https://goo.gl/Fz9nrQ'
          }
    }

    // ref to the parent document
    const db = admin.firestore()
    const userRef = db.collection('users').doc(userId)


    // get users tokens and send notifications
    return userRef.get()
        .then(snapshot => snapshot.data() )
        .then(user => {

            const tokens = user.fcmTokens ? Object.keys(user.fcmTokens) : []

            if (!tokens.length) {
               throw new Error('User does not have any tokens!')
            }

            return admin.messaging().sendToDevice(tokens, payload)
        })
        .catch(err => console.log(err) )
});
Deploy the function using:
firebase deploy --only functions
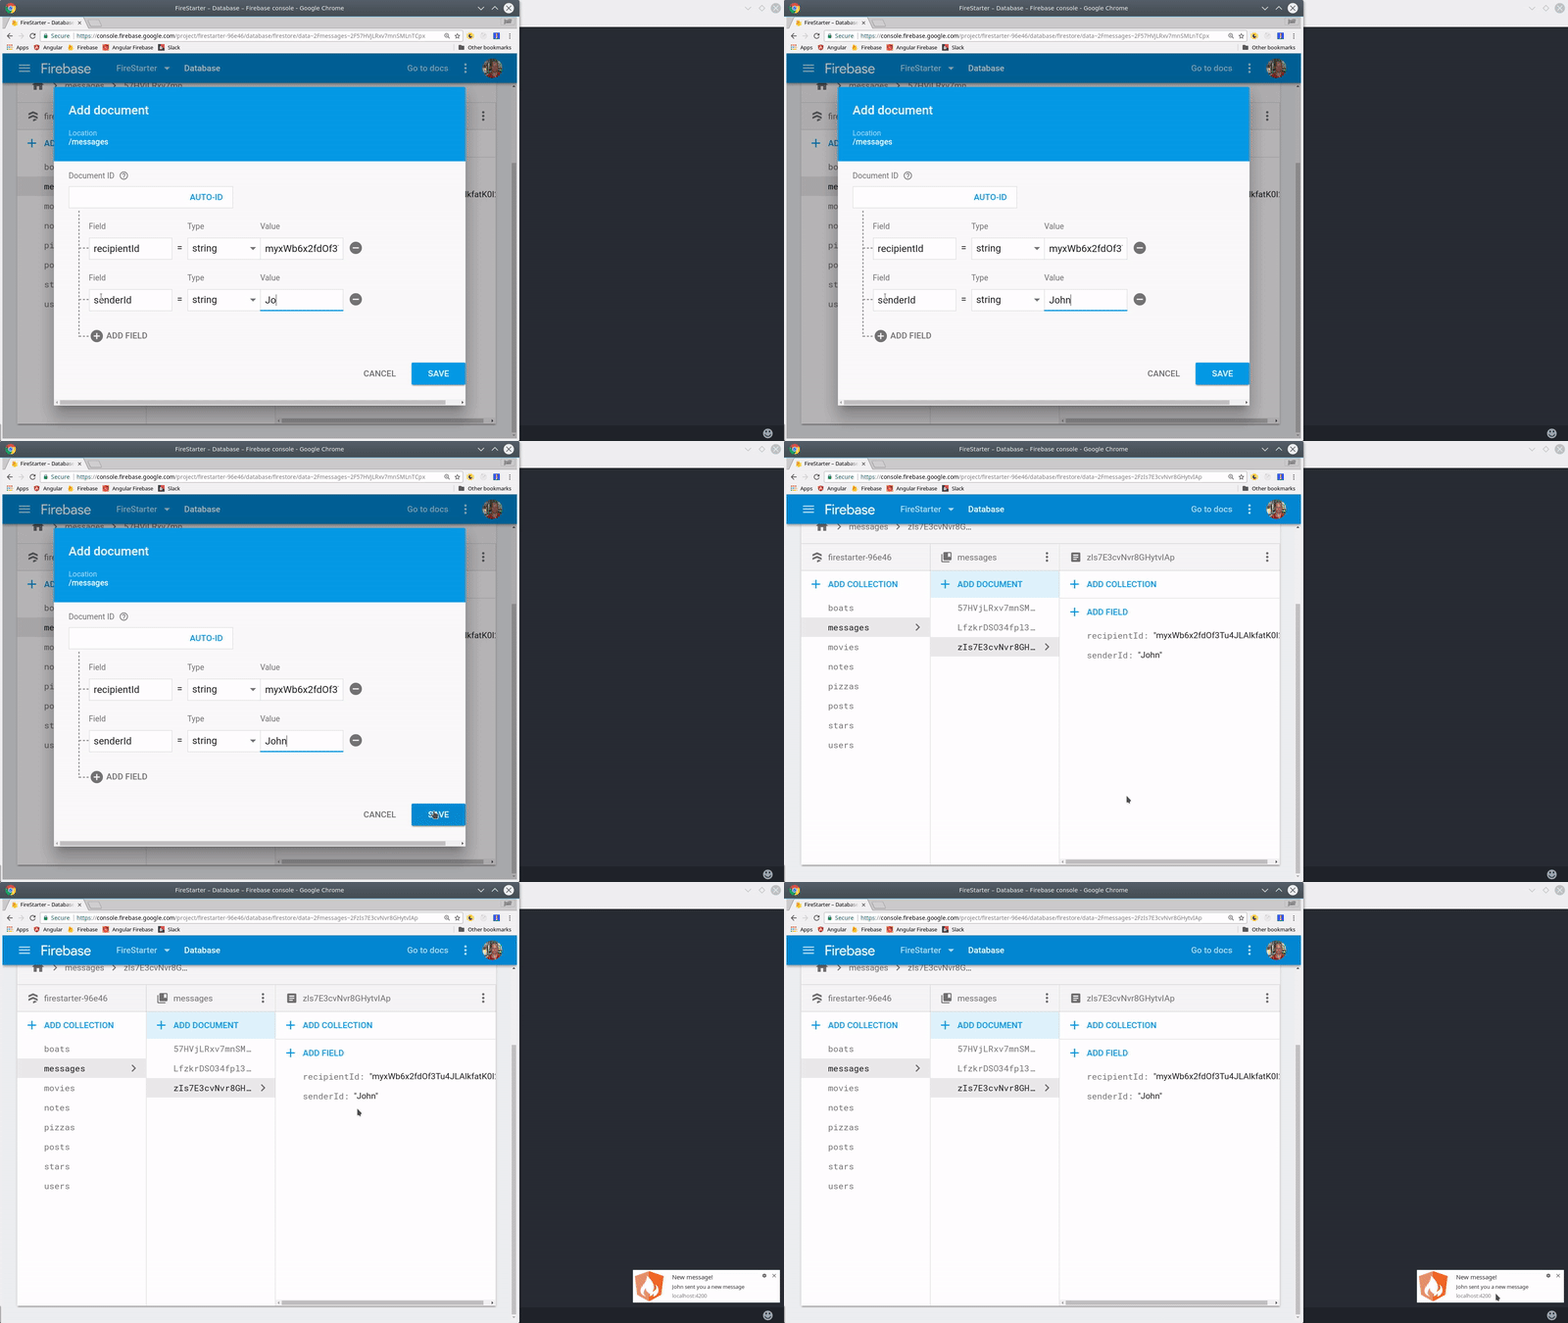
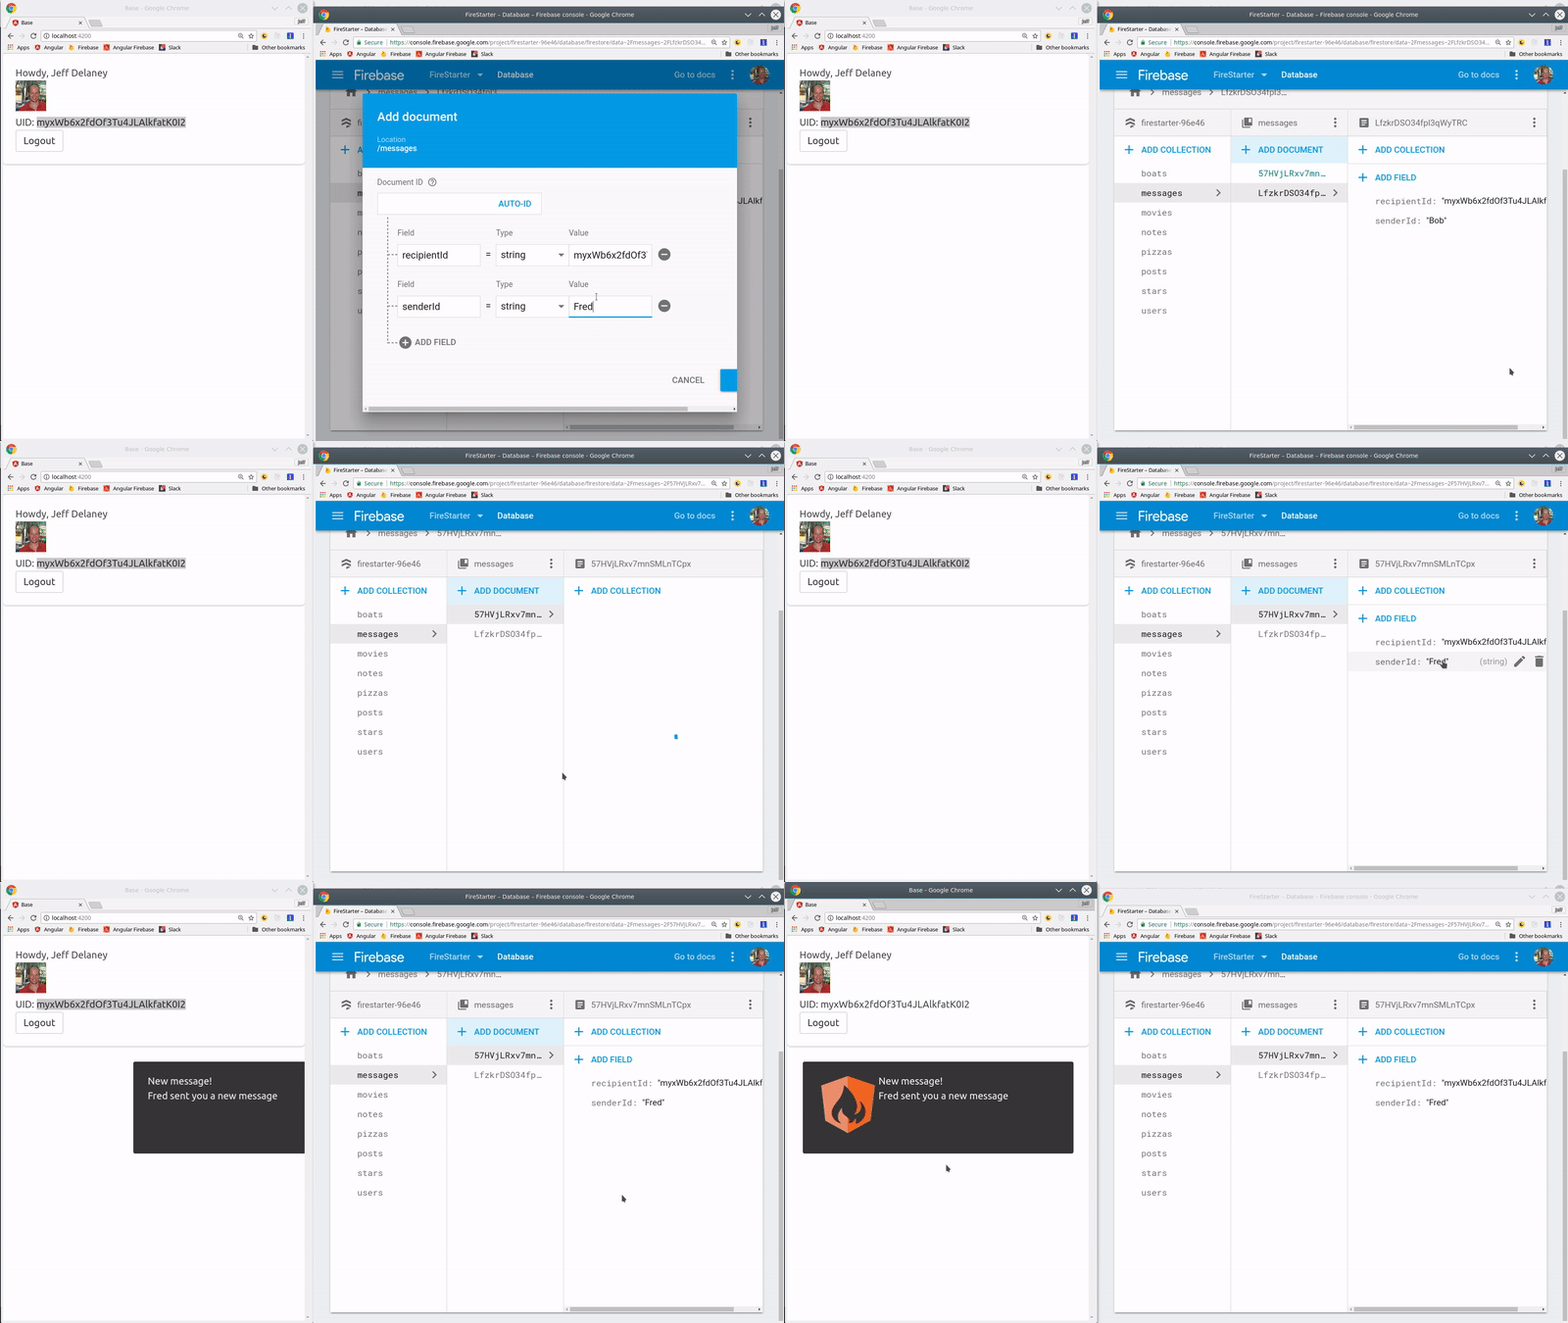
Manually add a new message document to firestore with the current user’s UID and you should see the notification displayed in your app.
The End
Push messaging is one of the most important features of Progressive Web Apps (PWA). Today we learned how you broadcast messages to a single user. In the next lesson, I will show you how to send messages to multiple users simultaneously based on topic.
