
Stripe Payment Intents Tutorial
Stripe provides a huge API with everything you could ever want to build a complex payment system. Recent changes in the online payments landscape have resulted in significant changes to the API, most notably the Payment Intents API. The following lesson demonstrates two modern strategies for accepting one-time payments - (1) Checkout and (2) Stripe Elements with Payment Intents.
As of September 2019, many European banks now require their customers to validate payments using 3D secure standard or Strong Customer Authentication SCA. As a developer, this means some users may be required to authenticate on their bank’s website to validate a purchase. Both strategies outlined below are compatible with 3D secure authentication.
Strategy 1 - Stripe Checkout
Stripe Checkout is a service that makes it possible to accept payments without any backend code and just a few lines of frontend code. It works by linking your product SKUs to a hosted checkout page.
- 🟢 Super easy to implement and works with 3D secure.
- 🔻 Limited UI customization options.
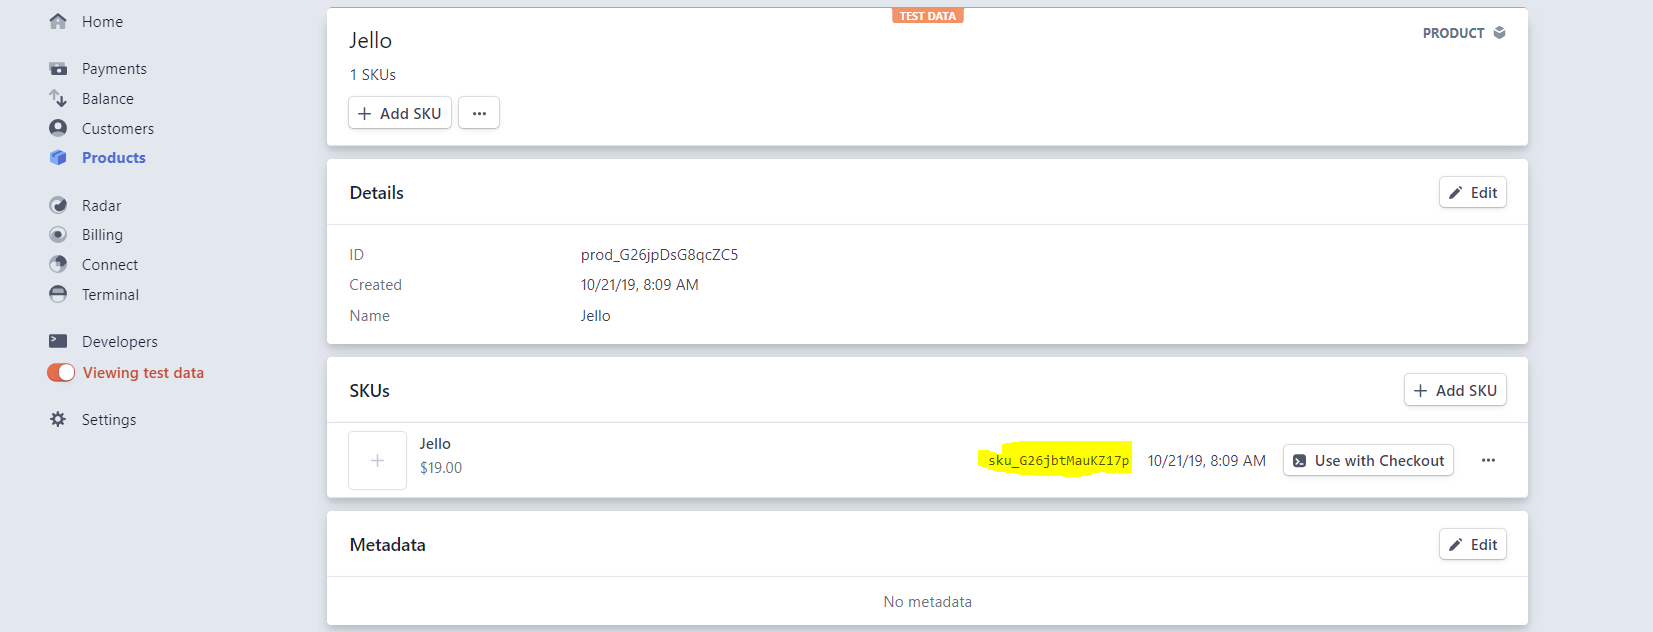
Create a Product
Head over the Stripe dashboard and create a product. Make a note of the SKU.
Add Stripe.js to Svelte
Create a new Svelte app and add the Stripe.js script tag to the head of the main HTML file.
npx degit sveltejs/my-svelte-store
<head>

	<script src="https://js.stripe.com/v3/"></script>
	<script defer src='/bundle.js'></script>
</head>
Product Component
Stripe can handle payment for a product (or multiple products and subscriptions) with the redirectToCheckout method. This will redirect the user to a page hosted by Stripe with a credit card for to pay for your products. The user can be directed back to a URL you specify when the payment is finished or canceled.
Initialize Stripe in Svelte with the publishable key
<script>

  // REPLACE with your Publishable Key
  let stripe = Stripe('pk_test_...');

  export let sku;
  export let amount;
  export let name;

  // Basic Checkout
  async function startCheckout() {

    const { error } = await stripe.redirectToCheckout({
      items: [{ sku, quantity: 1 }],

      successUrl: 'https://fireship.io/success',
      cancelUrl: 'https://fireship.io/canceled',
    });

    if (error) {
        alert('our payment system is broken!')
    }
  }
</script>

<section>

  <h2>Stripe Checkout</h2>

  <i>⌚</i>

  <button on:click={startCheckout}> Buy me ${amount / 100} </button>

</section>
Now you can use this component in your Svelte app like so:
<h1>My Svelte Store</h1>

<Product amount={1999} name={'Jello'} sku={'sku_...'} />
Strategy 2 - Payment Intents with Stripe Elements
Some apps need additional control over the UX. Stripe Elements provides customizable widgets that collect and validate payment information, which can be used with a custom payment flow on the backend.
- 🟢 More control over the payment flow and UX.
- 🔻 Requires additional work on both the frontend and backend.
This demo handle a one-time charge using a Payment Intent. Here’s what the flow looks like in five small steps.
- Your server creates a Payment Intent.
- The Frontend app shows a payment form with the
client_secretreturned from the server. - The user enters card details and submits the form.
- Stripe’s server charges the card and handles 3D secure auth if necessary.
- Your backend fulfills the purchase via a webhook.
Cloud Functions Setup
The backend Cloud Functions use TypeScript to provide better intellisense with the Stripe SDK. When working with Stripe over HTTP, I also recommend using Express.js or similar to provide multiple endpoints with shared middleware for CORS and user authorization.
💡 Tip: If using Firebase in your frontend app, it may be easier to implement Callable Cloud Functions, which you can learn more about in the Stripe Payments Master Course.
firebase init functions # with TypeScript

cd functions
npm i stripe express cors
npm i @types/stripe @types/cors -D
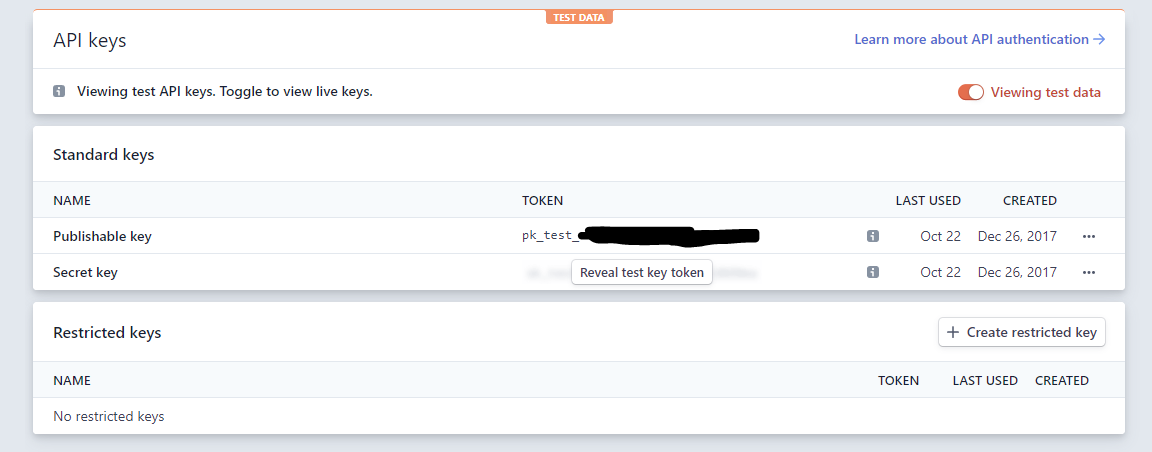
Grab your Stripe secret key and use it to initialize the Stripe Node SDK.
Initialize Stripe in your Cloud Functions with the secret key
import * as functions from 'firebase-functions';
import * as admin from 'firebase-admin';
admin.initializeApp();

import * as Stripe from 'stripe';
const stripe = new Stripe('sk_test_xxxxxxxx'); // TODO Set as Firebase environment variable

import * as express from 'express';
import * as cors from 'cors';

const app = express();
app.use(cors({ origin: true }));


app.post('/intents', async (req, res) => {
    // TODO
});


app.post('/webhook', async (req, res) => {
    // TODO
});


export const payments = functions.https.onRequest(app);
Create a Payment Intent
Before the user can submit a payment, your server must create an intent. It needs to specify an amount and currency.
app.post('/intents', async (req, res) => {
  const { amount } = req.body;


  const paymentIntent = await stripe.paymentIntents.create({
      amount,
      currency: 'usd',
      payment_method_types: ['card'],
      metadata: { uid: 'some_userID' }
  });

  res.send(paymentIntent);
});
Serve the API endpoint locally.
firebase serve --only functions
Stripe Elements in Svelte
(1) When the Svelte component is mounted, we hit our backend for a Payment Intent - you should only create one of these per user payment session. It contains the client_secret that Stripe will eventually need to charge the card.
(2) Next, we mount Stripe Elements to a div to create a credit card form. The submit button will remain disabled until the user has entered valid card details.
(3) When the card is valid, we submit the tokenized payment details and client secret to Stripe for processing.
<script>
  let stripe = Stripe('pk_test_m3a5moXVKgThpdfwzKILvnbG');

  // REPLACE with your Firebase Project ID
  let api = 'http://localhost:5000/awesomeapp-dev/us-central1/payments';

  export let amount;
  export let name;
  export let sku;

  // Payment Intents

  import { onMount } from 'svelte';

  let elements = stripe.elements();
  let card; // HTML div to mount card
  let cardElement;
  let complete = false;

  let paymentIntent;
  let clientSecret;

  onMount(async () => {
    paymentIntent = await createIntent();
    clientSecret = paymentIntent.client_secret;
    createCardForm();
  });

  // Step 1
  async function createIntent() {
    const url = api + '/intents';
    const params = {
      method: 'POST',
      headers: {
        'Content-Type': 'application/json'
      },
      body: JSON.stringify({ amount, name })
    };
    return ( await fetch(url, params) ).json();

    console.log(paymentIntent);
  }

  // Step 2
  async function createCardForm() {
    cardElement = elements.create('card');
    cardElement.mount(card);

    cardElement.on('change', (e) => complete = e.complete);
  }

  // Step 3
  async function submitPayment() {
    const result = await stripe.handleCardPayment(
      clientSecret, cardElement, {
        payment_method_data: {

        }
      }
    );

    paymentIntent = result.paymentIntent;

    console.log(paymentIntent)

    if (result.error) {
      console.error(error);
      alert('fudge!');
    }
  }
</script>


<section>

  <h2>Payment Intents with Stripe Elements</h2>

  <i>⌚</i>

  <div class="elements" bind:this={card}></div>

  <button on:click={submitPayment} disabled={!paymentIntent || !complete}>
    Submit Payment for ${amount / 100}
  </button>

</section>
Fulfill Purchases with a Webhook
Now that the app can accept payments, we need to do our part an fulfill the actual product. The implementation details will vary widely based on the app’s business logic, but a digital product can be delivered with a webhook. Stripe will send data about the payment to this endpoint immediately after the charge is processed, which can be used to update a database, send an email, push notification, and so on.
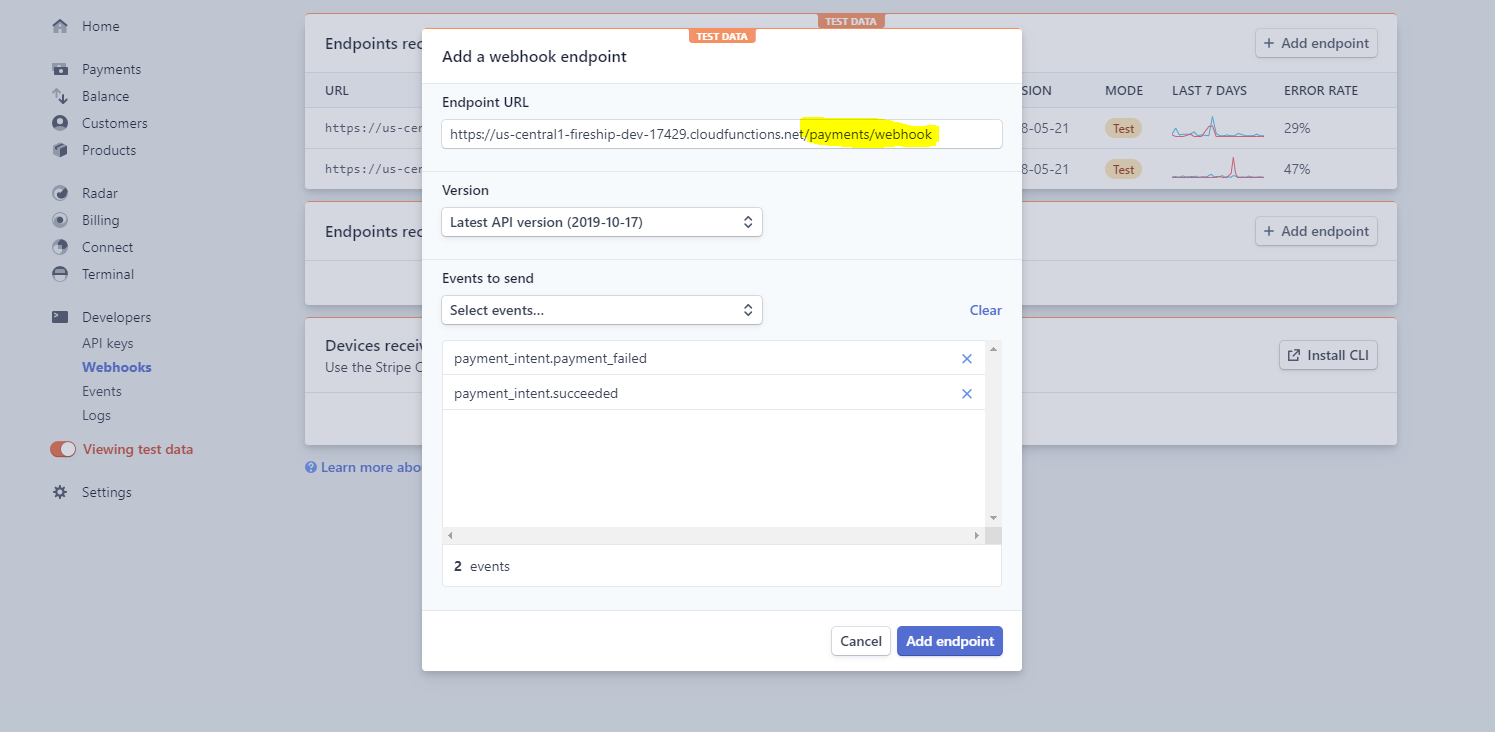
Create a webhook that points to your deploy Cloud Function endpoint
app.post('/webhook', async (req, res) => {
  const sig = req.headers['stripe-signature'] as string;


  const endpointSecret = 'whsec_...';

  let event;

  try {
    event = stripe.webhooks.constructEvent(req.body.rawBody, sig, endpointSecret);
  } catch (err) {
    res.status(400).end();
    return;
  }

  // Handle Type of webhook

  const intent = event.data.object;

  switch (event.type) {
    case 'payment_intent.succeeded':

      // Update database
      // Send email
      // Notify shipping department

      console.log("Succeeded:", intent.id);
      break;
    case 'payment_intent.payment_failed':
      const message = intent.last_payment_error && intent.last_payment_error.message;
      console.log('Failed:', intent.id, message);
      break;
  }

  res.sendStatus(200);
});