
Use Coder to Run VS Code on Google Cloud
Turning VS Code into a full IDE requires you to carefully blend your favorite extensions and packages for the type of development work you perform. It can take hours or even days to get your development environment fine-tuned for optimal productivity. But what happens upgrade to a new computer? Or need to share your IDE with somebody on the other side of the world? Or maybe you just need more compute resources…
The following lesson will teach you how to use Coder - a tool that allows you to run VS Code on any cloud and access it from the browser. We will take their open source project code-server and use it to run VS Code on Google Cloud Platform.
Run Coder VS Code On GCP
Create a VM
First, we need to spin up a virtual machine instance on Google Compute Engine. The recommended VM will cost about $0.067 per hour or $48.95 per month. Keep in mind, you can shut down the VM at anytime and billing will be calculated pro-rata to the second. The recommended OS is Ubuntu 16.04.
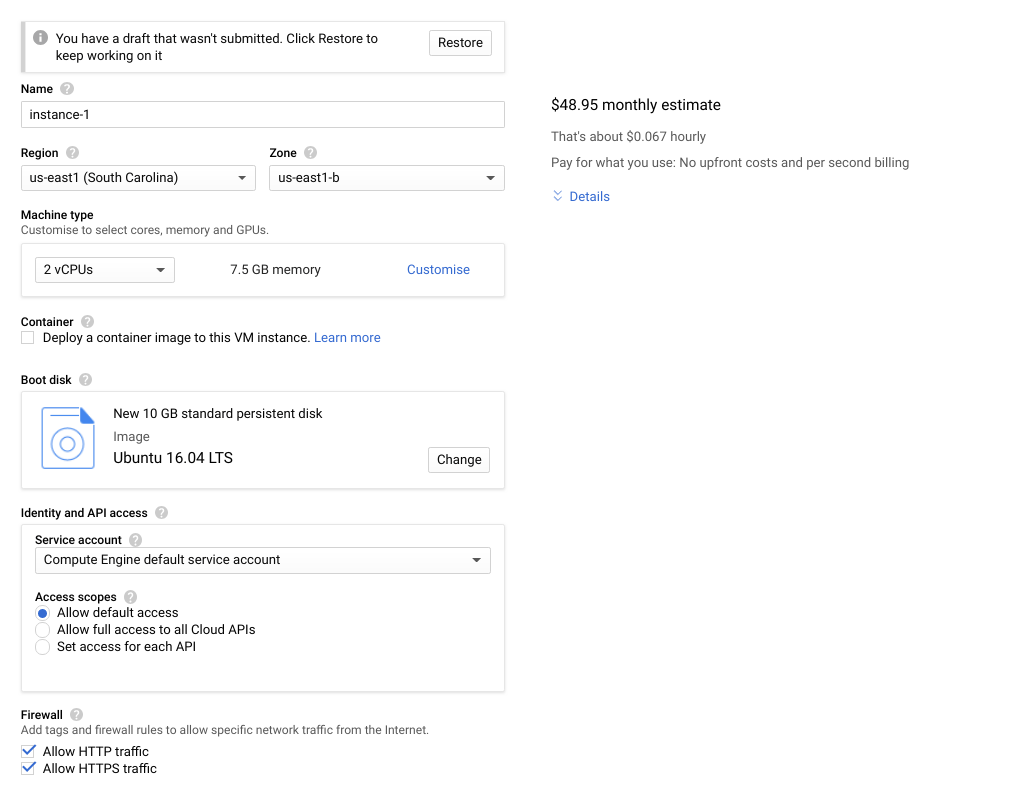
The recommended VM settings for Coder on GCP
SSH into your VM
Now we need to interact with the VM from the command line. Go to the instance details page and click on the SSH button.
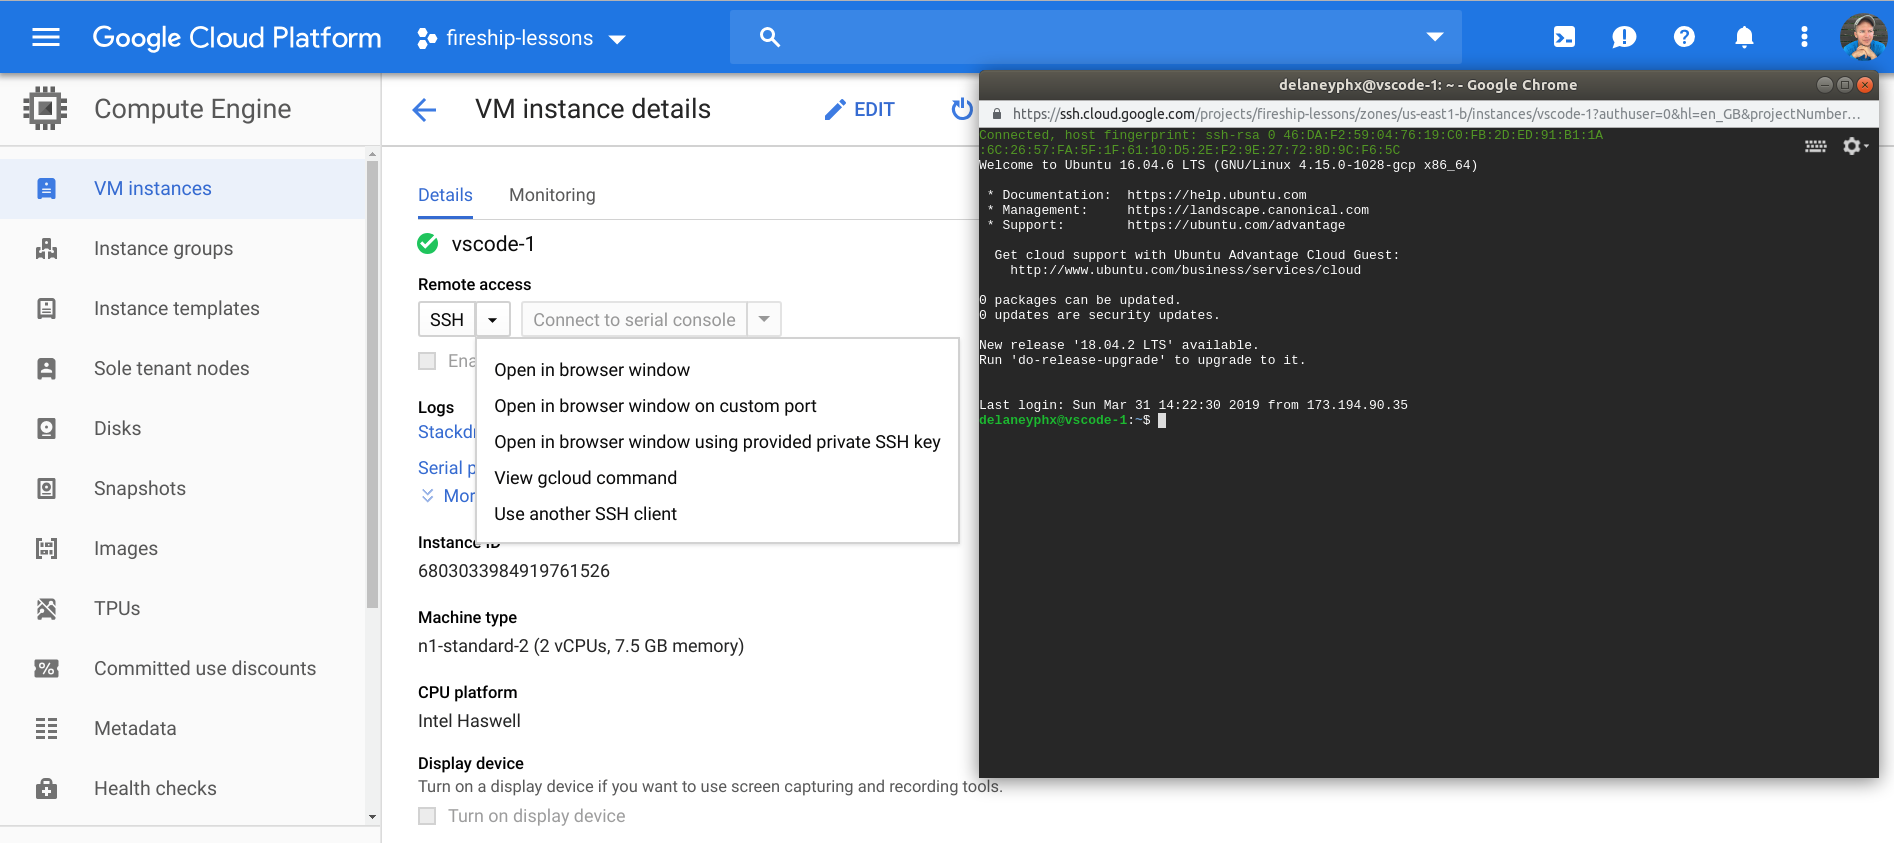
Start an SSH session with your Google Cloud VM
Find the latest release of Code Server, then download and unzip the release into the VM’s file system with the following commands:
wget https://github.com/codercom/code-server/releases/download/{version}/code-server-{version}-linux-x64.tar.gz
tar -xvzf code-server-{version}-linux-x64.tar.gz
Execute the binary to start serving VS Code on port 80.
cd code-server-{version}-linux-x64
sudo ./code-server -p 80
Access the VS Code on the Web
At this point we have a process for VS Code running and can access it from the web. Find the link to the external IP for the VM, then navigate to it on port 80, for example https://your-ip-address:80

Click on the external IP link
Initially, you will see this warning from the browser. Click Advanced -> Proceed Anyway
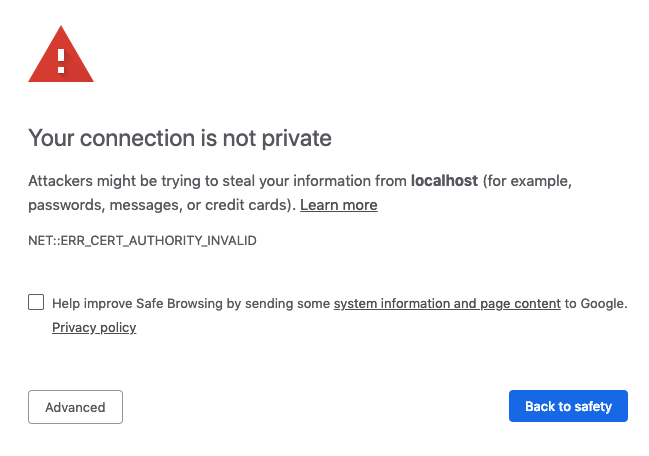
This is not actually unsafe because we own the VM
You need a password to access the editor, which was automatically generated in the terminal output.
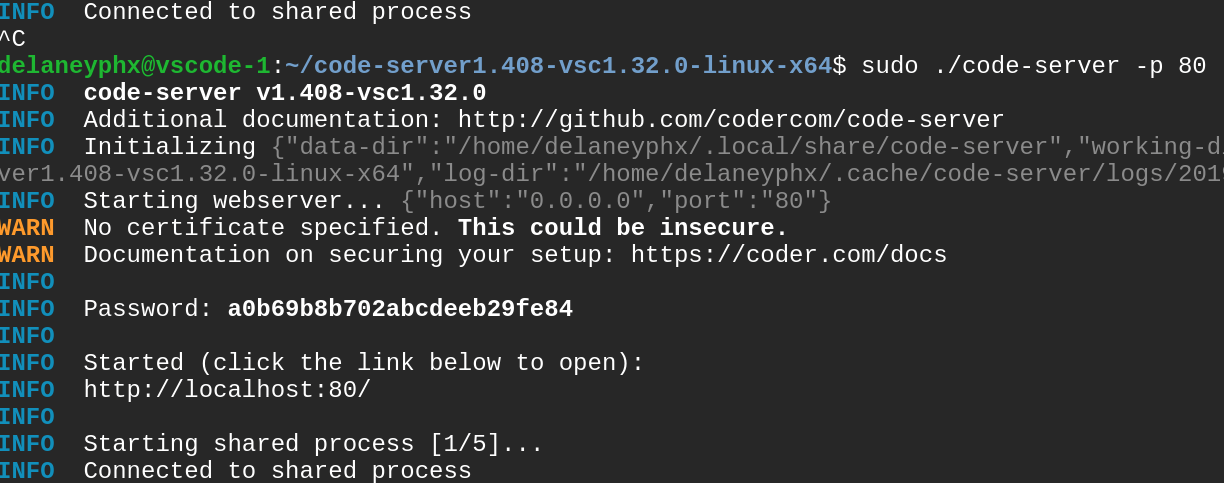
Copy the password in the middle of the terminal output
After entering the password you should have access to VS code in the browser.
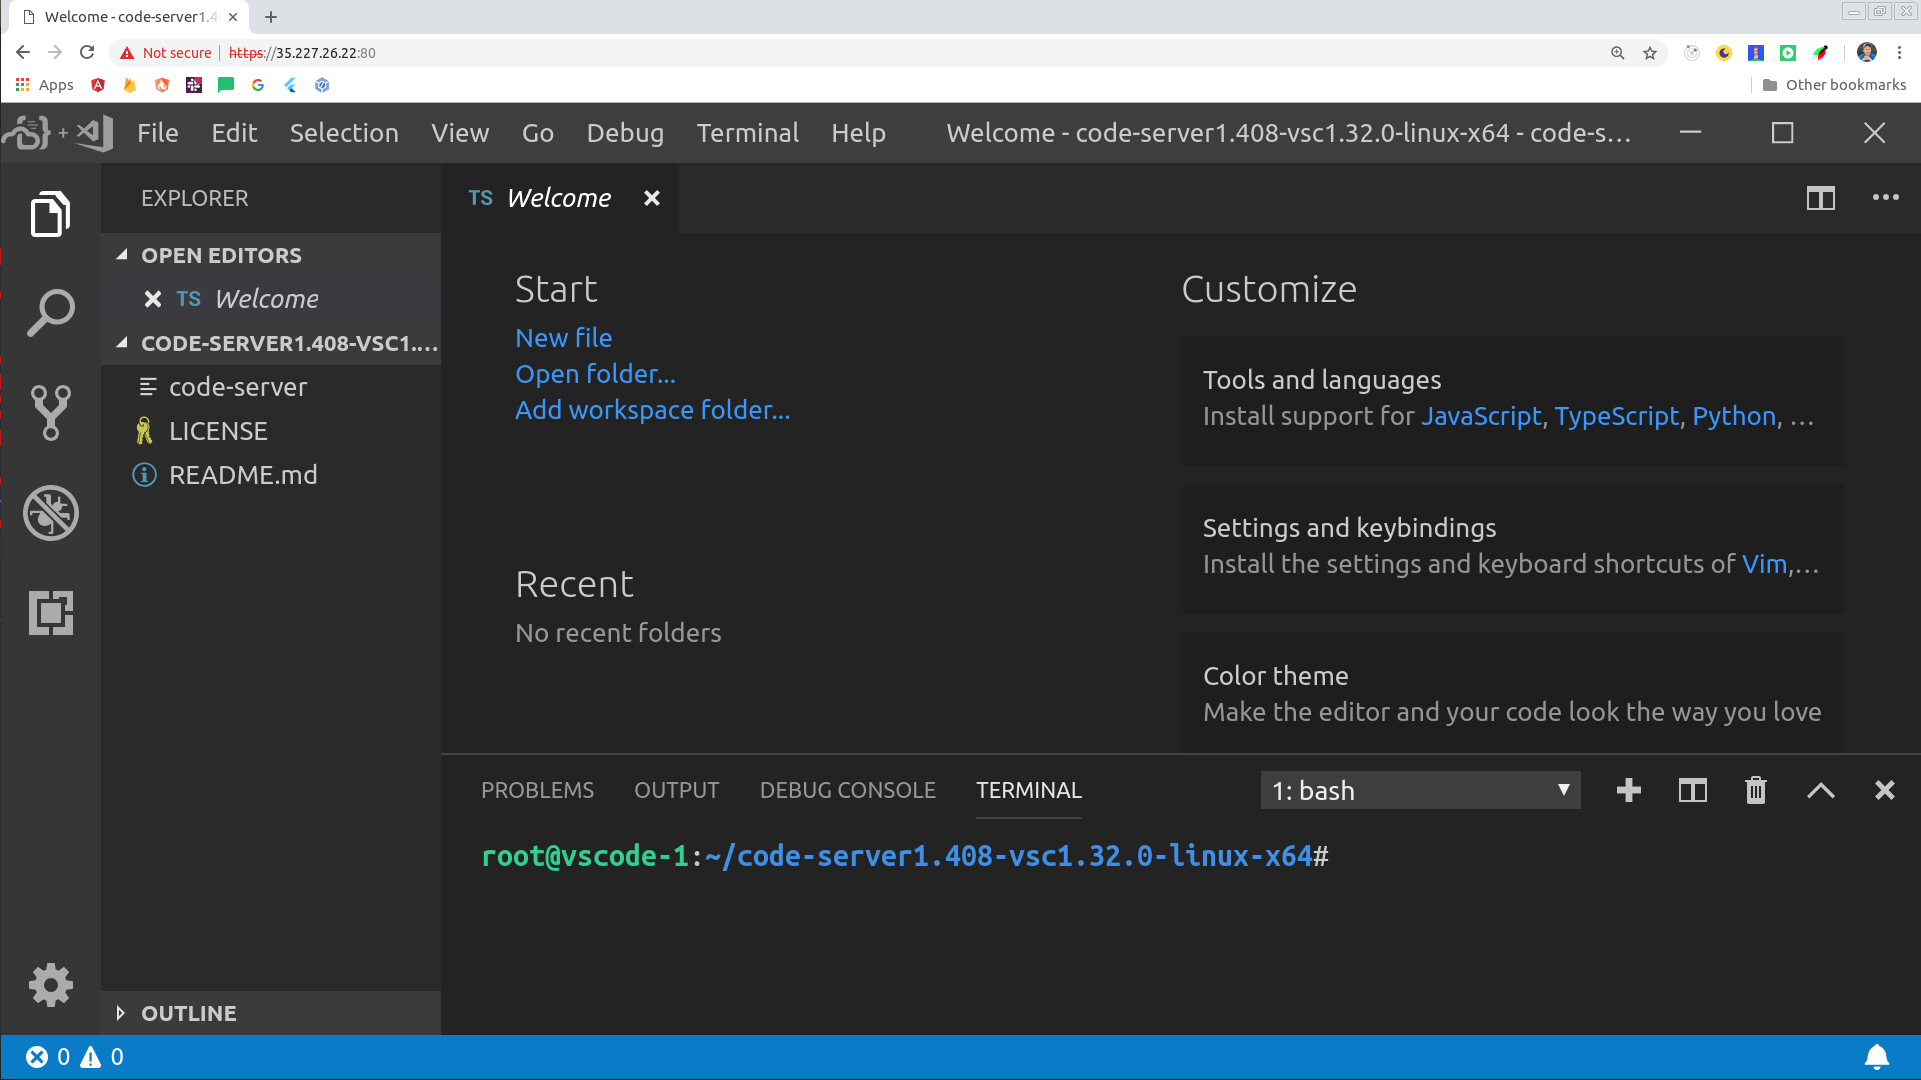
Done! Access VS Code and your files from any device, anywhere!
Frontend Development Configuration
After you have VSCode up and running in the cloud, you will likely want to configure it for frontend development with Angular, React, Vue, etc. Currently, we just have a bare bones VM without Node or NPM installed.
Install Node
Follow these instructions to install NodeJS. This will give you access to the nvm command for version management and the npm command for package management.
nvm install 10

npm install @angular/cli -g
Serving a Frontend Application on GCP Compute Engine
By default, GCP only exposes port 80 to inbound TCP traffic. That means if you try to run ng serve for Angular, which serves the app on port 4200 for example, it will not be accessible. Generally, I like to serve traffic on port 8080, and we can allow this by setting up a firewall rule like so.
ng new my-app
cd my-app
ng serve --port 8080
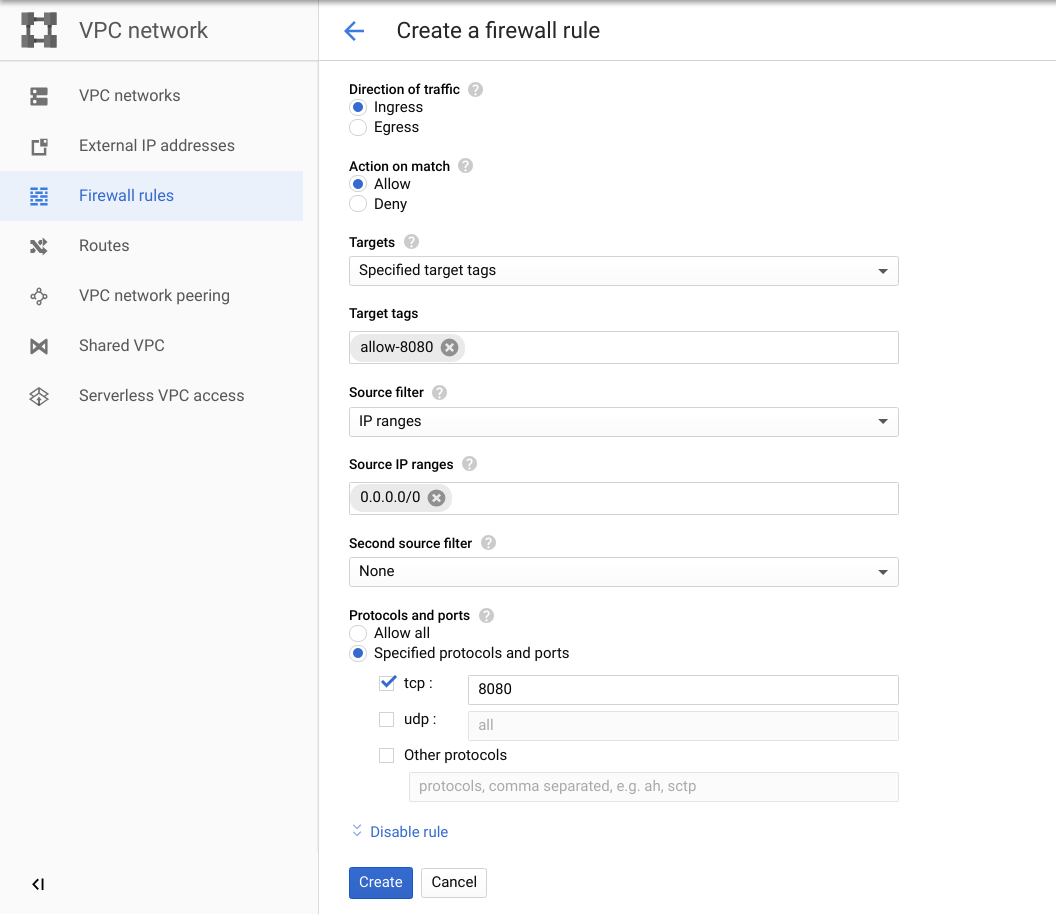
After creating the rule, make sure to tag your VM with with it under its settings
That’s it for now! You now have a basic environment for frontend development in the cloud. You can take this a step further by extracting this code into a Dockerfile for an easy containerized setup on any cloud.