
Setup Nest on Cloud Functions
The following snippet demonstrates two different techniques for setting up NestJS on Firebase Cloud Functions.
Option A - Point a Function to Nest
The first setup modifies the functions configuration to use the Nest /dist output, as opposed to the default functions directory. This option is ideal if you have an existing Nest app.
Step 1 - Create Nest App
nest generate app server
Step 2 - Add Functions
Add functions, then delete the automatically generated directory.
npm i -g firebase-tools
firebase init functions

rm -rf functions # delete functions dir
Now update the firebase config to point to the nest app.
  "functions": {
    "predeploy": [
      "npm --prefix \"$RESOURCE_DIR\" run build"
    ],
    "source": "server" // <-- here
  }
}
Step 3 - Install Dependencies
cd server
npm i firebase-functions firebase-admin express @nestjs/platform-express
Step 4 - Update the package.json
Add the following lines to your package.json.
{
  // ...
  "main": "dist/index.js",
  "engines": {
    "node": "8"
  }
}
Step 5 - Export the Server
Create a new file named src/index.ts that creates an exress app and wraps it with Nest.
import { NestFactory } from '@nestjs/core';
import { ExpressAdapter } from '@nestjs/platform-express';
import { AppModule } from './app.module';
import * as express from 'express';
import * as functions from 'firebase-functions';

const server = express();

export const createNestServer = async (expressInstance) => {
  const app = await NestFactory.create(
    AppModule,
    new ExpressAdapter(expressInstance),
  );

  return app.init();
};


createNestServer(server)
    .then(v => console.log('Nest Ready'))
    .catch(err => console.error('Nest broken', err));

export const api = functions.https.onRequest(server);
Step 6 - Build, Serve, Deploy
npm run build
firebase serve --only functions
firebase deploy --only functions
Option B - Add Nest to the Functions Source
In this setup, we perform a fresh install of Nest in the Functions source code. This is a good approach if you have existing background functions, but want to wrap Nest as an HTTP function.
Step 1 - Initialize Cloud Functions
Initialize Cloud Functions making sure to choose the TypeScript option.
npm i -g firebase-tools
firebase init functions
Step 2 - Install NestJS
Install Nest. If you have an existing project, also copy over the other dependencies from your Package.json.
cd functions
npm i --save @nestjs/core @nestjs/common rxjs reflect-metadata express @nestjs/platform-express
Step 3 - Add NestCLI Support
One of the best features in Nest is the CLI. Let’s add support by creating the following file:
{
    "language": "ts",
    "collection": "@nestjs/schematics",
    "sourceRoot": "src"
  }
Step 4 - Update the TS Config
Nest uses TypeScript features that are not enabled in Cloud Functions by default. Let’s change that.
{
  "compilerOptions": {
    "module": "commonjs",
    "noImplicitReturns": true,
    "noUnusedLocals": true,
    "outDir": "lib",
    "sourceMap": true,
    "strict": false,
    "target": "es2017",
    "emitDecoratorMetadata": true,
    "experimentalDecorators": true,
    "declaration": true,
    "removeComments": true,
    "baseUrl": "./",
    "incremental": true,
    "esModuleInterop": true
  },
  "compileOnSave": true,
  "include": [
    "src"
  ]
}
Step 5 - Generate an App Module
nest generate module app --flat

nest generate controller egg
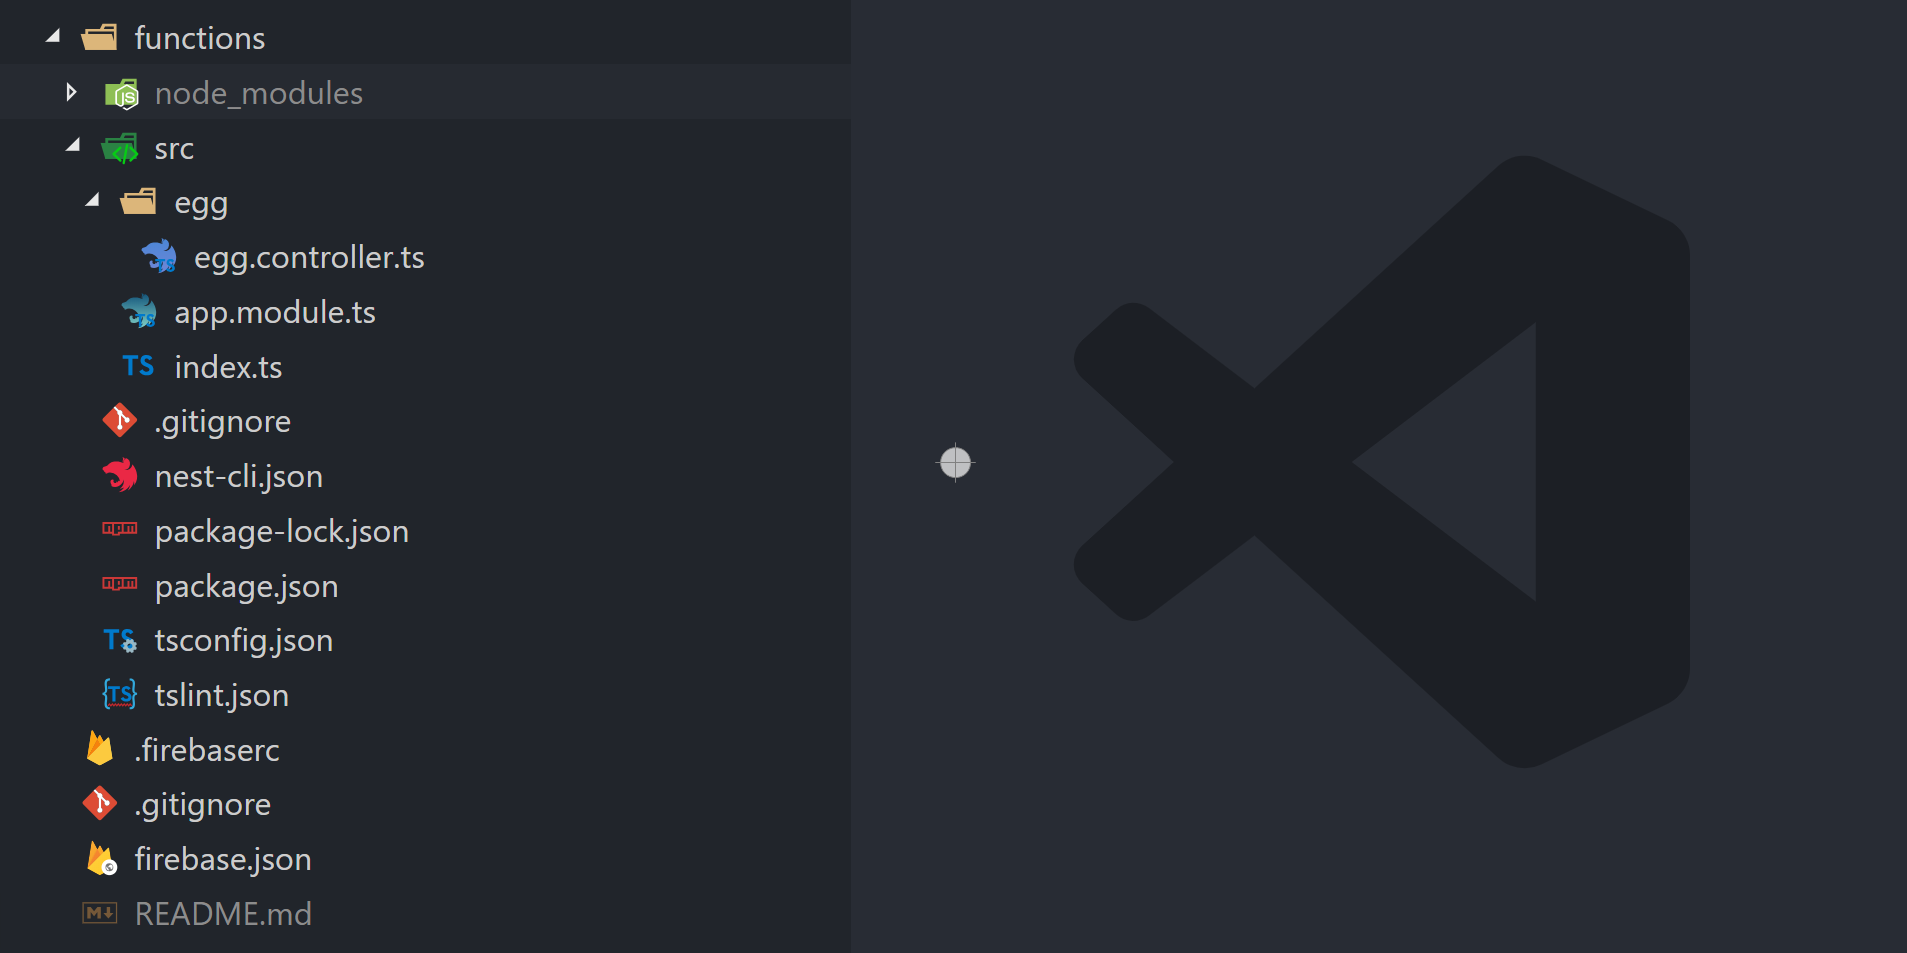
The file structure of Nest + Cloud Functions
Step 6 - Create the Server
Lastly, create the Nest server and wrap it in a Cloud Function. It’s purpose is to export an ExpressJS app and expose a function that wraps it with Nest.
import * as functions from 'firebase-functions';
import { NestFactory } from '@nestjs/core';
import { ExpressAdapter } from '@nestjs/platform-express';
import { AppModule } from './app.module';
import express from 'express';

const server = express();

const createNestServer = async (expressInstance) => {
  const app = await NestFactory.create(
    AppModule,
    new ExpressAdapter(expressInstance),
  );

  return app.init();
};


createNestServer(server)
    .then(v => console.log('Nest Ready'))
    .catch(err => console.error('Nest broken', err));

export const api = functions.https.onRequest(server);
Step 7 - Build, Serve, Deploy
cd functions
npm run serve

firebase deploy --only functions
The should give you a URL that looks like
http://localhost:5000/YOUR-PROJECT/REGION/api/eggs where you can start testing the API. Happy Nesting 🥚🥚🥚!