
Advanced Firebase Auth with Custom Claims
Firebase allows developers to modify authentication ID tokens to provide fine-grained system access to authorized users. The follow lesson adds custom claims to the Firebase user record to build a role-based access control feature that is secured with Firestore rules.
Set Custom Claims from the Command Line
It is not possible (currently) to add custom claims from the Firebase Console. This means we need to write some code with Firebase Admin.
In the real world, you will most likely update custom claims from a Cloud Function. For example, the user makes a purchase and you update their claim as a paid user.
Initial Setup
Th easiest way to update custom claims is to write a simple Node.js script. If starting from scratch, run the commands below in an empty directory.
npm init -y
npm i firebase-admin
touch index.js
Service Account
Download your service account from the Firebase settings tab and save it as service-account.json in the project directory. ⚠️ The service account contains sensitive API keys that should not be exposed publicly.
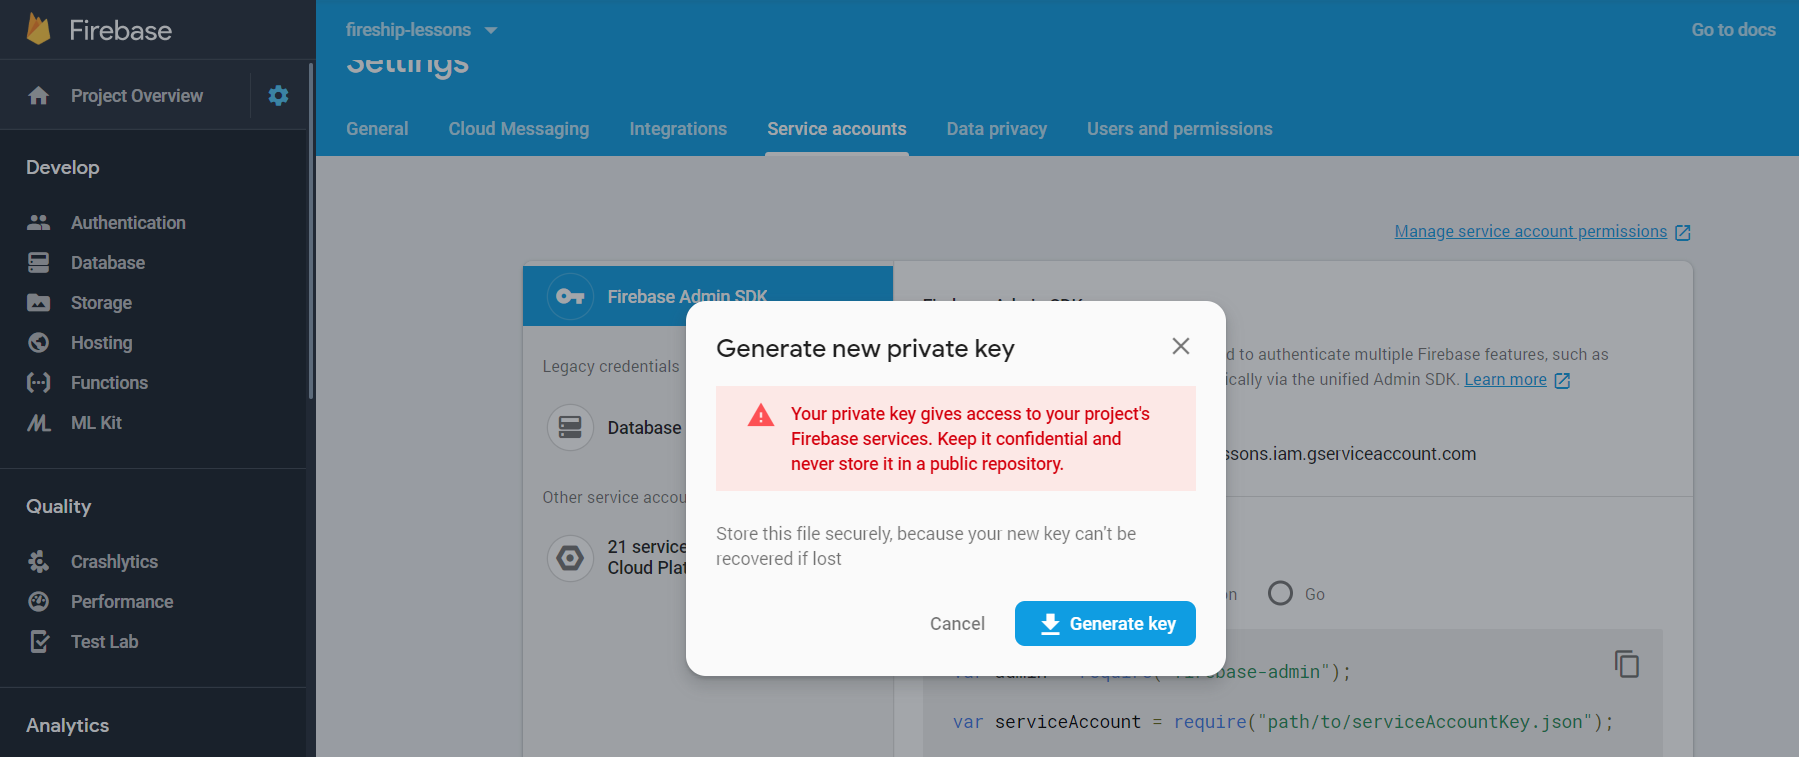
Download your service account
Update Claims with Firebase Auth
The script below calls the auth.setCustomUserClaims method to add a claims object to the user’s ID token. You can save any data to the claims object as long as it can be serialized to JSON.
The max size of the claims object is 1000 bytes. It is a good practice to only save the bare minimum amount of data required for authorization logic.
const admin = require('firebase-admin');
admin.initializeApp();

const auth = admin.auth();

const uid = 'NUc3KyG2RAfNuOrE0pzMMZegFHS2';

const customClaims = {
    roles: ['creator', 'auditor', 'admin']
};

(async() => {
    await auth.setCustomUserClaims(uid, customClaims);
    const user = await auth.getUser(uid);
    console.log('success', user)
    process.exit()
})();
Run the script from the command line making sure to set an environment variable that points to the service account.
GOOGLE_APPLICATION_CREDENTIALS=service-account.json
node index.js
Now that we have a way to update claims, let’s looks at a few common use cases.
Simple Admin Levels
Use Case
The most basic type of access control is to distinguish between a boolean value, such as paid/unpaid users or admins/non-admins. You might also fine tune access levels by also setting an integer value.
const customClaims = {
    admin: true,
    level: 7,
};
Firestore Rules
The Firestore rules grant read access to all admins, but limit write access to admins above level 5.
    match /{path=**}/secrets/{id} {
      allow read: if request.auth.token.admin;
      allow write: if request.auth.token.level > 5;
    }
Role-based Access Control
Use Case
A very common requirement is role-based authorization. A user can be assigned a list of roles, which determine if that user can perform a certain action. This strategy is common is CMS platforms - Wordpress for example has roles like super_admin, admin, editor, author, and so on.
const customClaims = {
    roles: ['creator', 'auditor', 'admin'],
};
Firestore Rules
We can assume a user with any role has read access, so checking by length is sufficient. For write access, we allow the admin to perform all actions, but limit the creator and auditor roles to specific types of writes.
match /{path=**}/secrets/{id} {
    allow read: if request.auth.token.roles.size > 0;
    allow create: if request.auth.token.roles.hasAny(['creator', 'admin']);
    allow update: if request.auth.token.roles.hasAny(['auditor', 'admin']);
    allow delete: if request.auth.token.roles.hasAny(['admin']);
}
Tip: You could make the code above more concise my extracting the logic into a rules function.
match /{path=**}/secrets/{id} {
    allow create: if userHasRole(['creator', 'admin']);
    allow update: if userHasRole(['auditor', 'admin']);
    allow delete: if userHasRole(['admin']);
}


function userHasRole(roles) {
    return request.auth.token.roles.hasAny(roles);
}
Access Control List
Use Case
Imagine an app where users can belong to multiple organizations AND have customized access assigned for each organization. For example, each company may want to limit access to a specific department.
An access control list (ACL) is the opposite of role-based auth. Rather than give the user sweeping access to a path, the ID of the resource determines if access can be granted to that user.
const customClaims = {
    orgs: {
        uber: ['accounting', 'finance'],
        tesla: ['manufacturing', 'ai'],
        mcdonalds: ['nuggets']
    },
}
Firestore Rules
The rule below matches the document ID to the user’s custom claims. For example a read to orgs/tesla/departments/manufacturing would be allowed in this example.
    match /{path=**}/orgs/{orgId}/departments/{departmentId} {
      allow read: if request.auth.token.orgs[orgId].hasAny([departmentId])
    }
Validate Claims from the Frontend
Retrieve the ID Token
Custom claims can also be used to build the frontend UI. Get the result of the ID token like so:
const token = await firebase.auth().currentUser.getIdTokenResult();

if (token.claims.admin) {
    // show admin UI
}
Force Refresh of the ID Token
The ID token will refresh every 1 hour, or you can force it to refresh manually to propagate changes to the custom claims.
firebase.auth().currentUser.getIdTokenResult(true);
👀 Alternative Approach
Learn how to implement roles without custom claims with the Firestore User Roles Tutorial